The Nikon D3100 is an excellent choice for beginners looking to explore outdoor photography. As an entry-level DSLR, it offers manual controls that allow photographers to fine-tune their shots while still being user-friendly.
Many new photographers start by using Auto Mode, but relying on it limits creative control. Learning manual settings helps capture stunning landscapes, action shots, and nature photography with greater clarity, depth, and color accuracy.
This guide will walk you through the best Nikon D3100 settings for outdoor photography, covering everything from exposure modes to focus settings, so you can maximize your camera’s potential.
Key Nikon D3100 Settings for Outdoor Photography
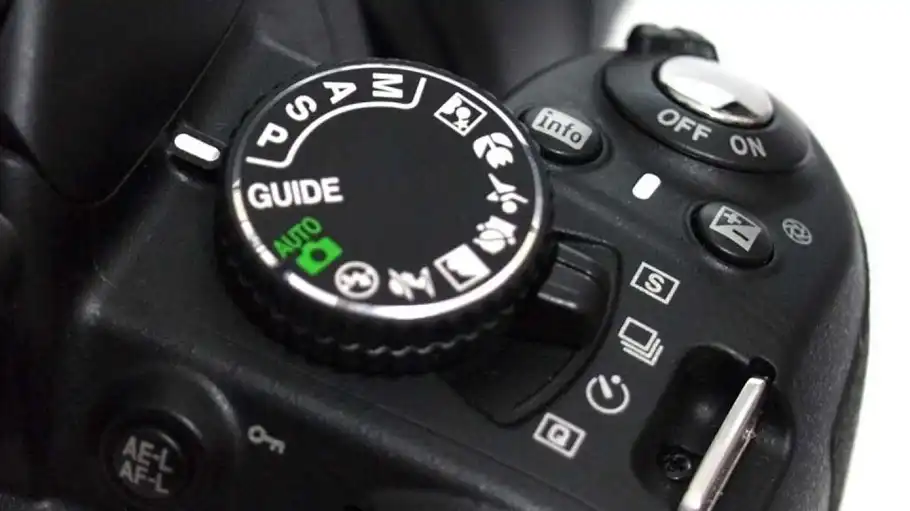
Choosing the Right Exposure Mode
Your choice of exposure mode determines how much control you have over aperture, shutter speed, and ISO. Here’s when to use each mode:
- Aperture Priority (A Mode) – Best for landscapes and portraits. It allows you to control depth of field while the camera adjusts the shutter speed.
- Use f/8 to f/16 for greater depth of field in landscapes.
- Use f/2.8 to f/5.6 for portraits with blurred backgrounds.
- Shutter Priority (S Mode) – Great for action shots where you need to control motion blur.
- 1/500s or faster to freeze moving subjects (wildlife, sports).
- 1/25s to 1s for motion blur in waterfalls or moving clouds.
- Manual Mode (M Mode) – Ideal for tricky lighting conditions where full control is necessary.
- Program Mode (P Mode) – Balances automatic settings with some manual flexibility.
- Scene Modes – Use Landscape Mode for optimized outdoor settings.
Aperture Settings (f-stop) for Outdoor Photography
- For sharp landscapes: Use f/8 to f/16 for a deep depth of field.
- For subject isolation (portraits, wildlife): Use f/2.8 to f/5.6.
- Avoid f/22+, as diffraction can reduce sharpness.
Shutter Speed Guidelines
- Handheld shots: Use 1/(focal length) to prevent blur (e.g., 1/100s for a 100mm lens).
- Fast motion (sports, wildlife): 1/500s to 1/1000s.
- Waterfalls and long exposures: 1/10s to 1s with a tripod.
- Low light: Use a tripod for exposures longer than 1/60s.
ISO Settings for Outdoor Photography
ISO affects how sensitive your camera is to light:
- ISO 100-200 – Best for bright daylight.
- ISO 400-800 – Use on cloudy days or in shade.
- ISO 1600-3200 – For night photography; expect some noise.
- Auto ISO: Set a max limit (ISO 800-1600) to prevent excessive noise.
White Balance for Natural Colors
White balance helps maintain accurate colors in different lighting conditions:
- Auto White Balance (AWB): Works in most conditions but can be inconsistent.
- Daylight: Warmer tones for sunny conditions.
- Cloudy: Adds warmth on overcast days.
- Shade: Neutralizes blue-tinted shadows.
- Custom White Balance: Best for precise color accuracy.
- RAW Format: Always recommended for flexibility in white balance correction.
Focus Modes for Outdoor Photography
- AF-S (Single-Servo AF): Best for stationary subjects like landscapes.
- AF-C (Continuous-Servo AF): Best for moving subjects (wildlife, sports).
- Manual Focus (M): Useful for fine adjustments in landscapes or low light.
AF-Area Modes
- Single-Point AF: Great for precise focus, such as on a specific landscape element.
- Dynamic AF/3D-Tracking: Ideal for subjects that move within the frame.
- Auto-Area AF: The camera selects focus points; less reliable for landscapes.
Metering Modes (Measuring Light)
- Matrix Metering (default): Best for balanced exposure in most scenes.
- Center-Weighted Metering: Focuses exposure on the center; useful for portraits.
- Spot Metering: Measures a small area; great for high-contrast scenes.
Image Quality Settings
- RAW (NEF): Best for maximum quality and post-processing.
- JPEG Fine: Suitable for direct use but less flexible in editing.
- Image Size: Always set to Large for highest resolution.
Active D-Lighting (For High-Contrast Scenes)
- On: Helps in high-contrast situations (JPEG only).
- Off: Best when shooting RAW for manual adjustments.
Noise Reduction Settings
- High ISO Noise Reduction: Turn On for JPEGs; better controlled manually in RAW.
- Long Exposure Noise Reduction: Use for exposures over 1 second.
Auto Distortion Control
- Turn On to correct lens distortions in JPEG images.
Release Modes (Shutter Options)
- Single Frame: Standard mode.
- Continuous Mode: For capturing action sequences.
- Self-Timer: Prevents camera shake for long exposures.
Essential Gear for Outdoor Photography with Nikon D3100
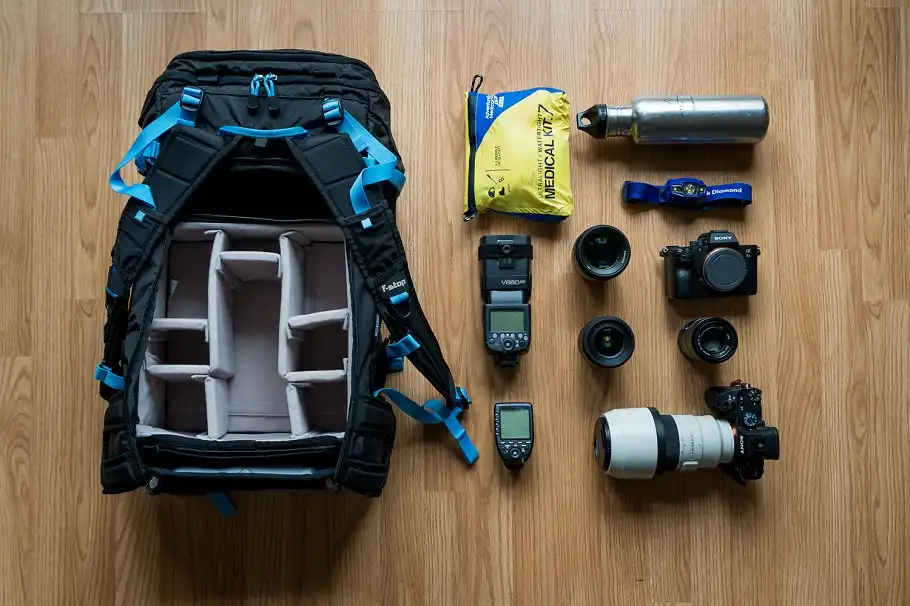
Best Lenses for Outdoor Photography
Choosing the right lens can make a significant difference in the quality of your outdoor photos. The Nikon D3100 is compatible with a range of lenses that cater to different outdoor scenarios.
- Nikon 18-55mm f/3.5-5.6 (Kit Lens) – A good all-purpose lens for beginners.
- Nikon 35mm f/1.8G DX – Excellent for sharp landscapes and low-light conditions.
- Sigma 10-20mm f/4-5.6 – Ideal for ultra-wide landscapes and dramatic perspectives.
- Nikon 55-200mm f/4-5.6 – A great choice for wildlife and distant subjects.
For landscape photography, a wide-angle lens is highly recommended to capture expansive scenes. For wildlife, a telephoto lens allows you to get close-up shots from a distance.
Tripods & Stabilization
A stable camera is crucial for sharp images, especially in low-light situations and long exposures.
- Tripod – Essential for night photography, waterfalls, and any long-exposure shots.
- Turn off VR (Vibration Reduction) when using a tripod to avoid unnecessary corrections that may introduce blur.
- Use a remote shutter release or self-timer to prevent camera shake when pressing the shutter.
Filters for Outdoor Photography
Filters help control light and enhance image quality directly in-camera.
- Polarizing Filter – Reduces reflections, enhances sky contrast, and makes colors pop.
- Neutral Density (ND) Filters – Helps achieve long exposure effects in bright daylight by reducing the amount of light entering the lens.
Other Useful Accessories
- Remote Shutter Release – Eliminates vibrations for long-exposure shots.
- Extra Batteries – Cold weather or long shooting sessions drain battery life quickly.
- Lens Hood – Reduces lens flare and enhances contrast in bright conditions.
Composition & Shooting Techniques for Better Outdoor Photos
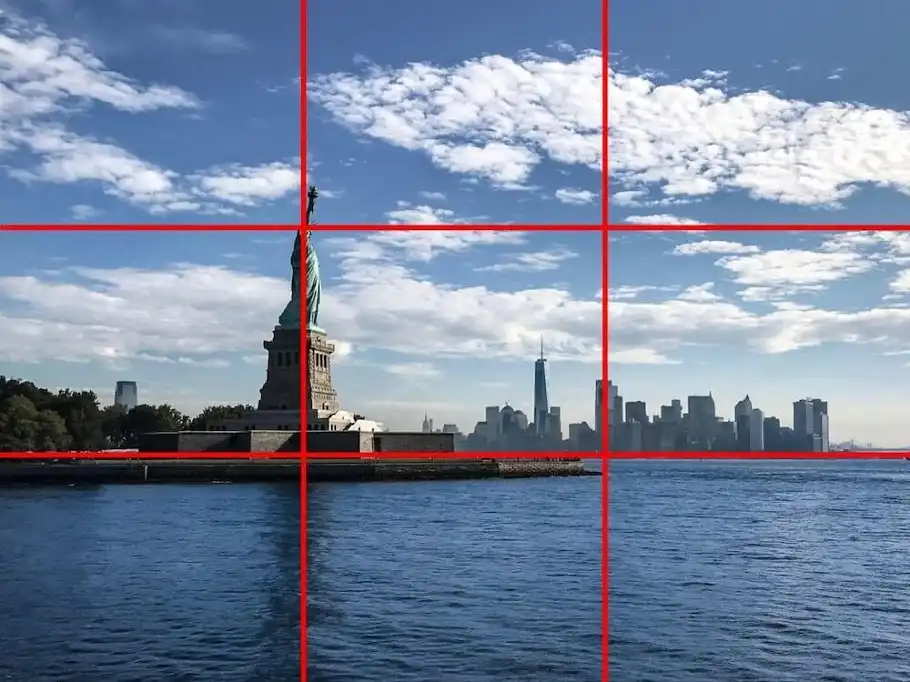
Framing & Composition Rules
A well-composed photo is visually pleasing and draws the viewer’s attention to the subject.
- Rule of Thirds – Divide your frame into a 3×3 grid and position subjects along these lines for a balanced composition.
- Leading Lines – Use natural lines (roads, rivers, fences) to guide the viewer’s eye toward the subject.
- Foreground Interest – Adding an element in the foreground (rocks, flowers) creates depth and enhances landscapes.
Using Hyperfocal Distance
For maximum sharpness in landscape photography, focus at the hyperfocal distance. This ensures that everything from a certain point in front of the camera to infinity remains sharp.
Capturing Motion in Outdoor Photography
- Panning Technique – Keep the subject sharp while blurring the background to create a sense of motion.
- Silky Water Effects – Use long exposures with ND filters to smooth out waterfalls and rivers.
Adjusting Exposure Compensation
Outdoor lighting can be tricky, especially with bright skies or shaded areas. Use exposure compensation (+/- EV) to brighten or darken images when needed.
Using Live View Mode
Live View mode allows for more precise composition and focus adjustments, especially for tripod shots and manual focusing in low light.
Post-Processing & Editing Outdoor Photos
Once you’ve captured great shots, editing enhances them further. At Pixel Retouching, we offer professional photo retouching services to take your images to the next level.
Enhancing Colors & Contrast
Use Lightroom or Photoshop to adjust brightness, contrast, and saturation to bring out the best in your outdoor photos.
Sharpening & Noise Reduction
High ISO images may introduce noise, which can be reduced through software tools. Sharpening helps retain detail but should be applied carefully to avoid artifacts.
Cropping & Composition Refinements
Even a well-composed shot can benefit from slight cropping to improve framing and remove distractions.
For professional photo editing and retouching services, visit Pixel Retouching for expert adjustments and enhancements.
Final Tips
Mastering the Nikon D3100 for outdoor photography is about understanding its settings, using the right gear, and practicing good composition techniques.
- Learn manual settings to have full creative control.
- Experiment with different lighting conditions to enhance your skills.
- Invest in essential gear like a tripod, filters, and extra batteries.
- Shoot in RAW format for more flexibility in post-processing.
- Practice composition techniques to improve your outdoor shots.
With the right approach and consistent practice, you can capture stunning outdoor photos with your Nikon D3100. If you want professional-grade edits to make your images stand out, Pixel Retouching is here to help!