If you’ve ever scrolled through a fashion store online and felt instantly drawn to a product image, chances are, it was a flat lay. There’s something visually satisfying about a clean, thoughtfully arranged flat lay that makes you stop and look. It communicates texture, shape, and style without needing a model.
For fashion and apparel brands—especially those selling through Shopify, Etsy, Amazon, or Instagram—flat lay photography is more than a trend. It’s a conversion tool.
This article will walk you through everything you need to know—from setting up your scene to editing your final shots. Whether you’re a DIY brand owner or looking to outsource the process, we’ll help you create flat lays that don’t just look good—they sell.
What Is Flat Lay Clothing Photography?

Flat lay photography is exactly what it sounds like: clothing laid flat on a surface and photographed from above. The bird’s-eye view removes distractions and puts the product front and center.
It’s popular among:
- Direct-to-consumer fashion brands
- Handmade apparel sellers on Etsy
- Amazon private label clothing lines
- Instagram boutiques and TikTok sellers
Unlike mannequin or model shots, flat lays offer a more controlled and consistent presentation. They’re cost-effective and don’t require hiring models or elaborate staging.
But they’re not just for saving money. Flat lays create a visual story. When styled well, they hint at how the outfit fits into a lifestyle. A neatly folded sweater with a leather bag and sunglasses can say “weekend casual” in a glance.
That’s the power of a flat lay—it’s not just product photography, it’s a visual suggestion.
The Right Gear and Environment for Flay Lay Cloth Photography
Flat lay photography might look simple, but getting professional results depends heavily on the setup.
Lighting Is Everything
Natural light is the go-to for most beginners. Set up near a large window and use a white sheet or curtain to diffuse the light. Harsh sunlight will create strong shadows and uneven highlights, especially on textured fabrics like linen or waffle knit.
If you’re shooting indoors or want more control, a continuous LED lighting kit works best. Look for lights that offer adjustable temperature (between 5000K–6500K) to simulate daylight. Softboxes or umbrellas help diffuse the light evenly across the flat lay.
Avoid overhead shadows by keeping your light source at a 45-degree angle or directly above, if using a ceiling mount or boom arm.
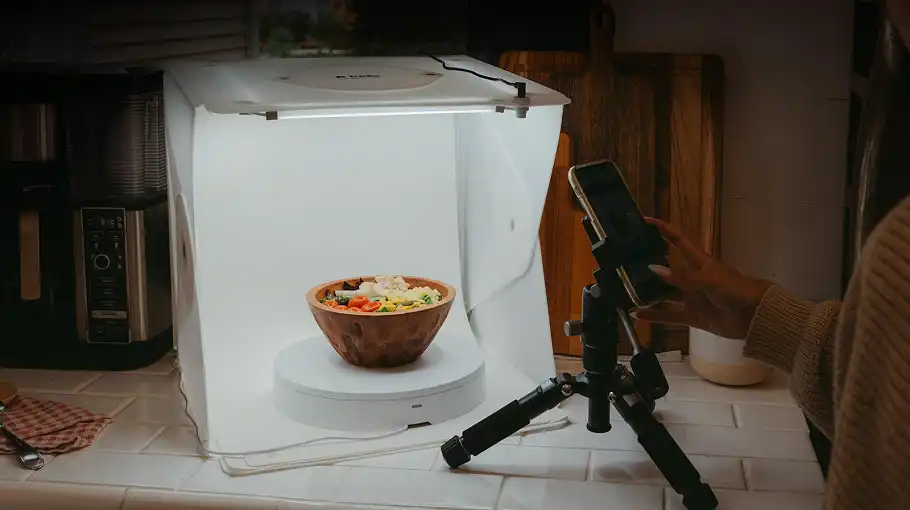
Choosing the Right Camera and Settings
You don’t need a $5000 camera setup. A mid-range DSLR like the Canon EOS Rebel series or a mirrorless Sony Alpha camera will do the job. Even modern smartphones like the iPhone 14 Pro or Google Pixel can capture excellent flat lays—with some limitations.
What matters more is:
- Stability: Use a tripod with a horizontal arm for perfect top-down shots.
- Aperture: Set to f/4 or f/5.6 to keep everything in focus.
- Shutter speed: At least 1/125s to avoid motion blur (use a remote shutter or timer).
- ISO: Keep it low (100–200) to avoid grain.
If you’re using a smartphone, shoot in manual mode with a tripod. Use gridlines to maintain symmetry and avoid perspective distortion.
Surfaces, Styling Boards, and Backgrounds
The backdrop is as important as the clothing itself. Keep it neutral unless your brand is intentionally bold.
Most brands stick to:
- White foam boards
- Wood panels (for lifestyle appeal)
- Seamless paper rolls (grey, beige, or muted tones)
Textured backgrounds (like linen or concrete) can add character but be careful—they can clash with the fabric or make the scene feel too busy.
A solid white background is a safe bet if you’re planning to upload to Amazon or Shopify, where clean, distraction-free imagery often performs best.
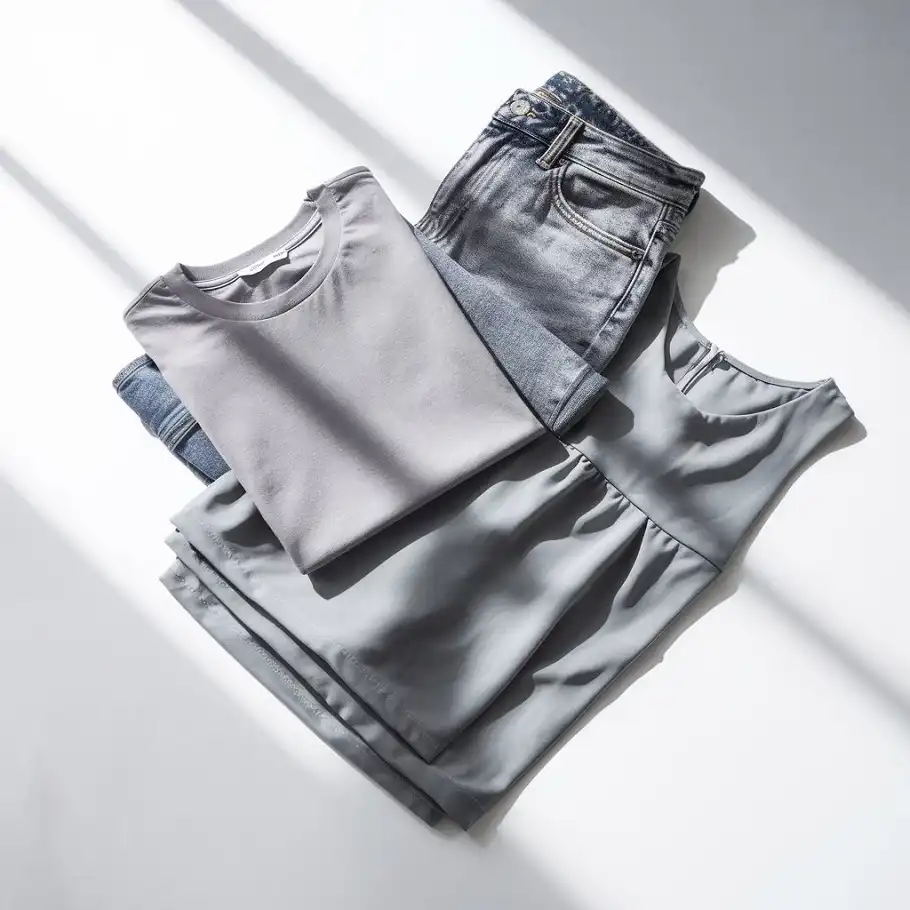
How to Style Clothes for a Perfect Flat Lay
This is where artistry comes in.
A flat lay is more than laying clothes down flat and clicking the shutter. It’s about creating shape, dimension, and emotion through arrangement.
Start With Steam or Iron
Creased clothing kills credibility. A wrinkled T-shirt or rumpled dress looks unprofessional, even if the product is great. Always iron or steam each item beforehand.
Give the Item a Body
Since there’s no model, you need to shape the item as if someone’s wearing it. Use pins, clips, or tissue paper to fill sleeves or shape collars.
For example:
- T-shirts: Slightly bend the arms inward for a natural look.
- Pants or jeans: Fold one leg slightly or cuff the hems.
- Dresses: Use invisible threads or light pins to spread the skirt naturally.
Keep It Symmetrical—But Not Robotic
Symmetry makes a flat lay look clean. But too much precision can make it feel lifeless.
Try to center the garment but introduce a slight twist—maybe tilt a pair of sneakers at an angle, or place a necklace cascading off the shirt.
Tell a Visual Story
Add one or two complementary items to give context. A denim jacket with sunglasses and a wallet hints at a “weekend look.” A workout tee next to a yoga mat and bottle creates a fitness mood.
But less is more. Don’t clutter the frame. The clothing should still be the hero.
Shooting for Platforms Like Amazon, Shopify, Etsy, and eBay
Each eCommerce platform has its own image guidelines. Ignoring them can mean your listings don’t display properly—or worse, get rejected.
Amazon
- Main image must be on a pure white background (RGB 255,255,255)
- Image should occupy at least 85% of the frame
- Minimum resolution: 1000px on the longest side
- No props or accessories in the main image
For flat lays on Amazon, this means styling your clothing cleanly and cropping tightly. Keep props for secondary images only.
Shopify
Shopify is flexible, but consistency matters. Use the same dimensions, aspect ratios, and backgrounds across your product catalog. Shopify recommends 2048 x 2048 pixels for square images.
Flat lays are excellent for featured lifestyle images on product pages or homepage banners.
Etsy
Etsy allows more creativity. You can use styled flat lays as your primary image. But make sure the garment is clearly visible, well-lit, and not overshadowed by accessories.
eBay
eBay now encourages clean, white backgrounds, similar to Amazon. Keep image size above 1600px on the longest side, and ensure no watermarks or text overlays.
Retouching Flat Lay Clothing Photos Like a Professional
Even the best-shot photo needs post-processing.
Creases, dust specks, uneven lighting, or shadows can distract from your product. Professional editing enhances what you’ve captured, without altering the reality of the product.
Common Flat Lay Editing Needs
- Wrinkle removal
- Color correction to match true fabric tone
- Background cleanup or whitening
- Shadow adjustment to make the product pop
- Cropping and alignment for symmetry
Photoshop and Lightroom are the most used tools, but they take time to learn. If you’re shooting a large catalog of clothing items, the editing alone can take hours or days.
This is where services like Pixel Retouching come in. We specialize in retouching flat lay apparel images—removing imperfections while keeping the garment looking natural. You upload, we deliver back clean, ready-to-upload files that match your platform’s specs.
Tip: Always save your images in high resolution (300dpi) in case you want to use them for print later.
How to Style Clothing for Flat Lay Photography
A well-styled flat lay photo can instantly elevate even the simplest piece of clothing. It’s not just about showing the product—it’s about evoking a lifestyle. The goal is to help viewers imagine themselves wearing the outfit.
Start by thinking about the story you’re telling. Are you showcasing a cozy fall look? A sleek, modern business outfit? A laid-back beach day? Your styling decisions should support that narrative.
Smooth out wrinkles carefully. Even tiny creases can become distracting once lit and photographed from above. Use a handheld steamer to clean up folds and fluff up areas that look flat.
Fold or tuck areas strategically. A sleeve might need a slight bend to feel natural. Waistbands can be rolled to reduce bulk. Collars should lie crisp. Pants often look better folded in half vertically, or styled with a “kick” in the ankle to create shape.
You can even use invisible tricks—double-sided tape or small pins—to hold parts in place. These subtle touches ensure the outfit looks tailored and intentional.
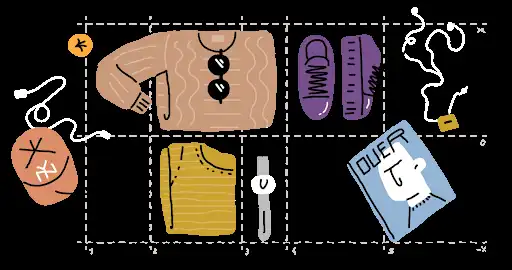
Props and Accessories: Do They Belong?
Yes—but only when they add value.
Accessories can enrich the story behind your clothing. For example:
- A knit sweater might be styled with a cup of coffee and a pair of reading glasses.
- A beach dress could be paired with a straw hat, sunglasses, and sandals.
- A men’s casual look might include a leather watch or folded newspaper.
But be careful: too many props dilute the focus. Everything should support the clothing, not compete with it.
Neutral-toned props work best. Avoid anything with bold logos or colors that draw the eye away. The best props almost fade into the background, reinforcing the lifestyle without screaming for attention.
Lighting Techniques That Work Best for Flay Lay Photography
Lighting can make or break your flat lay.
The most common choice? Natural light, especially from a large window. It’s soft, even, and flattering. Morning or late afternoon gives a more diffused glow, while midday light can be too harsh unless softened with sheer curtains.
But if you’re shooting indoors regularly or during off-hours, artificial light is more consistent.
Here’s how to light a flat lay professionally:
- Use two softboxes or LED panels, placed on opposite sides, angled at 45 degrees toward the product. This creates an even spread and avoids harsh shadows.
- Add a diffuser to soften the light. A white bedsheet works in a pinch.
- Use reflectors or white foam boards to bounce light into shadowy areas.
- Avoid direct overhead lights—they often cause ugly hotspots or color shifts.
Want dramatic lighting? Introduce shadows intentionally. One light from the side with no fill will create depth and shape. It’s moody but works well for luxury or editorial clothing brands.
Pro tip: Always check the lighting consistency across all your product photos. Inconsistent light makes your catalog look mismatched, even if the clothes are styled perfectly.
Post-Processing Flay Lay Cloth Photography
Flat lays often look flat—until you edit them.
That’s where Pixel Retouching’s Apparel Photo Editing comes in. We transform raw clothing photos into professional-grade product images.
Here’s what great post-processing typically involves:
- Color correction to ensure the product matches its real-life color. Online buyers rely heavily on accurate color.
- White balance adjustment to remove yellow or blue tints from lighting.
- Brightness and contrast tweaks to add pop without distorting reality.
- Shadow cleanup or addition, depending on the desired aesthetic.
- Wrinkle and dust removal to clean up fabric inconsistencies.
- Edge refining to make silhouettes clean and polished.
“60% of online shoppers say product photos are more influential than product descriptions.”
— eMarketer Study, 2023
If you’re handling edits yourself, tools like Adobe Lightroom or Capture One are great for batch edits and color work. Photoshop is better for retouching and more complex edits.
But for businesses and fashion retailers, outsourcing flat lay editing ensures consistency, saves time, and delivers polished results. That’s exactly what we do at Pixel Retouching—we take your raw flat lays and elevate them to professional product imagery that converts.
Frequently Asked Questions
What camera is best for flat lay clothing photography?
You don’t need a high-end DSLR, but a camera with a large sensor and manual control is ideal. Mirrorless options like the Canon EOS R or Sony Alpha series work great. Even smartphones like the iPhone 15 or Google Pixel 8 can deliver solid results—with the right lighting and editing.
How do I make my clothing look 3D in flat lays?
Use shadow and shape to add depth. Roll collars slightly, pinch waists, and style sleeves with curves or bends. Lighting from the side can also enhance dimensionality.
Can I do flat lay photos on a budget?
Absolutely. Use natural light, a clean sheet or foam board as a background, and your smartphone. Focus on styling and editing. Great flat lays are more about planning than gear.
Should I always use props?
Not always. Use props only if they enhance the story. A minimalist brand might skip props entirely, while a lifestyle brand might lean on them heavily.
What’s the best background color?
White is the default choice—it’s clean and easy to edit. But neutral grays, beige tones, or soft pastels also work, depending on your brand’s identity. Just avoid colors that overpower the product.
Bottom Line
In eCommerce, visuals are your storefront. And flat lay clothing photography is one of the fastest, most scalable ways to showcase your products while maintaining creative control.
It blends clarity with storytelling. Structure with emotion. It allows you to show products neatly while still creating a lifestyle mood.
But great flat lays require more than snapping from above. It’s about planning, precision, styling, lighting, and editing. Get these right, and your brand will stand out in a sea of sameness.
At Pixel Retouching, we help fashion brands and online sellers turn basic clothing shots into stunning flat lay imagery that sells. Whether you’re a boutique just getting started or a large catalog retailer needing hundreds of consistent images, we’ve got your back.
Ready to elevate your clothing photography?
Let’s transform your next product shoot. Contact Pixel Retouching today.