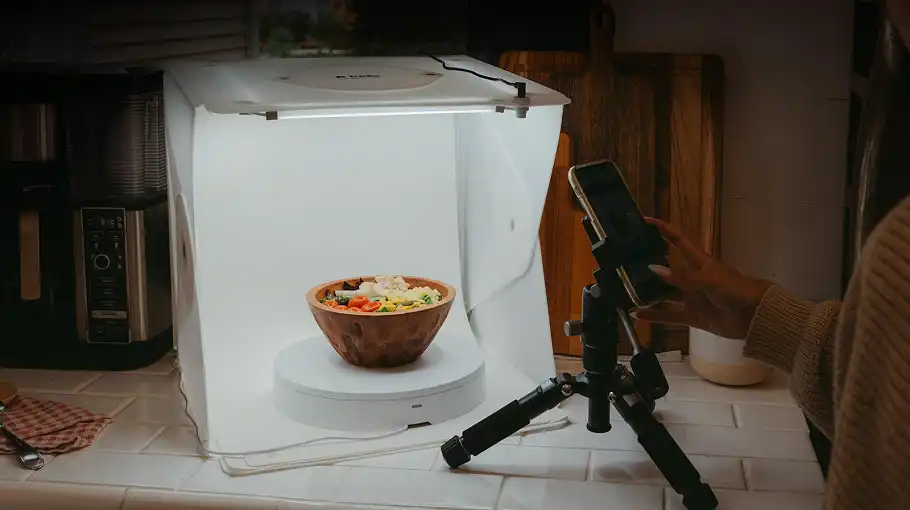
Let’s face it-when you’re selling clothes online, a flat photo just doesn’t cut it. Mannequin photography is the real game-changer, the gold standard that gives your garments that lifelike, three-dimensional vibe buyers crave. It builds trust, keeps your store looking sharp and consistent, and turns casual scrollers into checkout-clickers.
“Throw in some ghost or invisible mannequin magic, and you’ve got products that seem to float effortlessly, showing off every seam, lining, and curve without any distractions.”
If you’re ready to level up your ecommerce visuals, this guide walks you through the whole process, step by step, so your catalog doesn’t just look good-it sells.
Short Key Takeaways: Mannequin Photography for Ecommerce
- Why It Works: Ghost/invisible techniques create 3D “floating” clothes, boosting trust and sales by revealing fits/linings-beats flat lays every time.
- Mannequin Choice: Modular ghost models ($150–$300, white/grey) for easy editing; test fit first.
- Core Gear: DSLR + 50–85mm lens (ISO 100/f8–11), tripod, side lights (5000–8000lm, 45°/3:1 ratio), color checker ($100) for accurate hues.
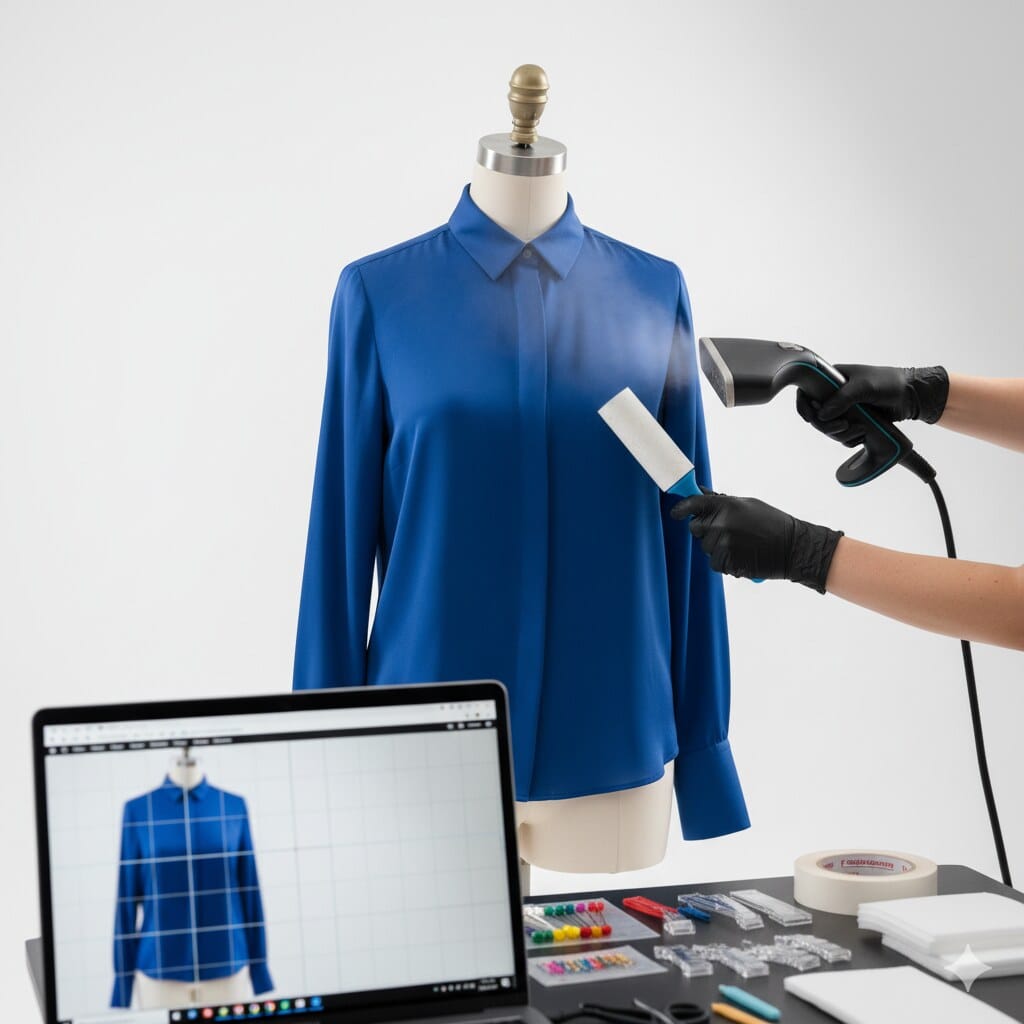
- Prep & Style: Steam (5–10min/item), lint-roll, pin/pad for symmetry/volume-use grids to avoid flops.
- Shoot Smart: 6–8 angles + macros/inners; batch 20–30/hr with manual settings. Closer lights for shiny fabrics.
- Lighting/Colors: Diagram setups; 5500K manual + monthly monitor calibration (Spyder) for true-to-life results.
- Post-Prod: Photoshop cleanup (5–15min/img), composite/mask, subtle shadows; actions for 50–100 batches <2hrs.
- Output: 2000×2000 JPEG/PNG (<200KB), keyword names/alt text, white BGs-comply with platforms.
- Fixes & Scale: Quick tweaks for wrinkles/reflections (delta E <2); outsource 500+ imgs ($0.50–$2 ea) vs. in-house small.
- Checklist: Prep, mark spots, lock settings, shoot all-print & follow for flawless flow.
Choosing the Right Mannequin for Professional Results
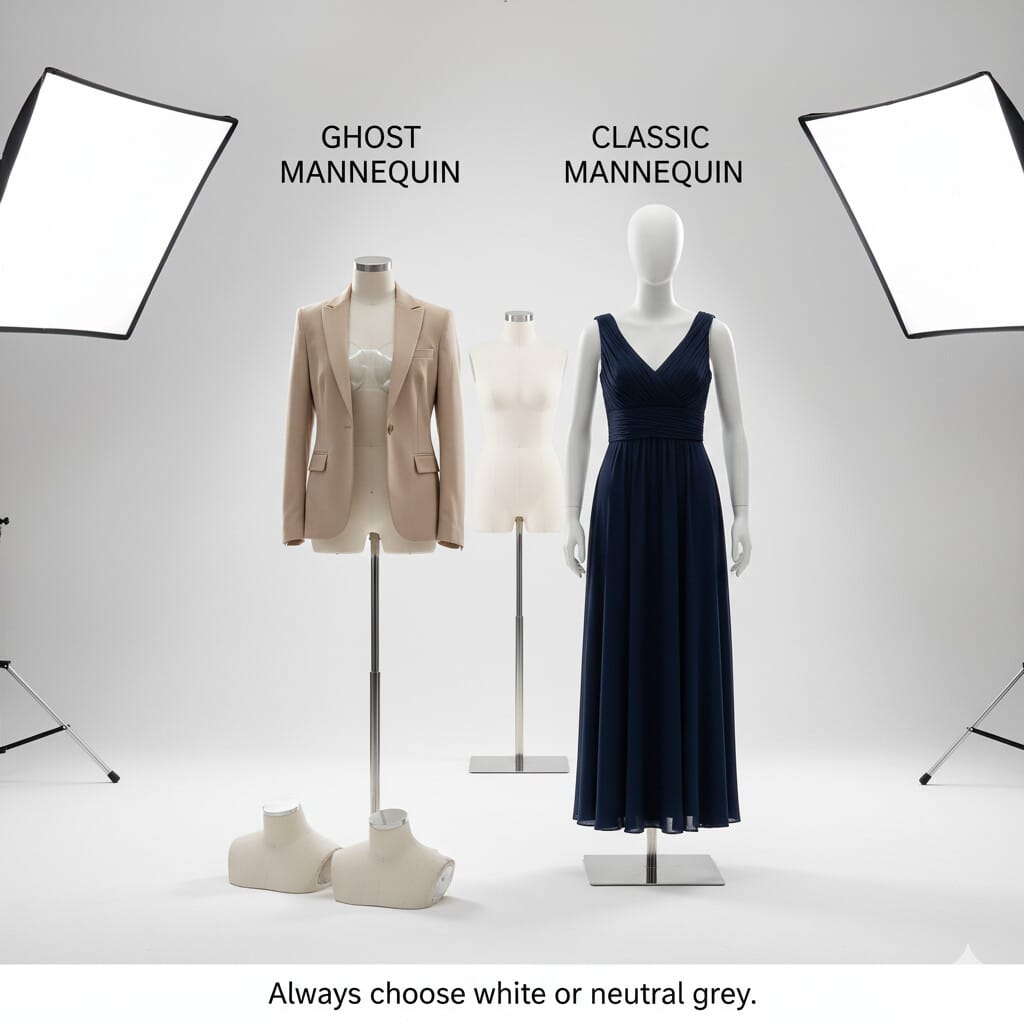
Everything starts with picking the perfect mannequin-it’s like choosing the right foundation for your house. Get this wrong, and the rest wobbles.
- Ghost Mannequins: These clever modular forms let you pop off parts like the neck or arms, making it a breeze to composite in post-production and show off how the clothes really fit inside and out. They’re worth the splurge-figure $150 to $300 for a solid set that handles standard sizes without a hitch.
- Classic Mannequins: For simpler setups, these do the job for basic front-and-back snaps, though they’re not as flexible for fancy edits. Budget options start at $50–$100.
And color matters: stick to white or neutral grey to avoid weird reflections messing with your fabric hues. It’s a small choice that saves you headaches later.
Pro Tip: Always test a garment on your mannequin before buying-fit is everything!
Essential Equipment and Studio Preparation
 Setting up your studio is all about creating that reliable space where magic happens consistently. Think of it as your photography command center-gear up right, and you’ll breeze through batches without second-guessing.
Essential Equipment
Start with a DSLR or mirrorless camera hooked to a 50–85mm telephoto lens; it gives you that natural, distortion-free view that makes clothes look real. Crank it to ISO 100, f/8–f/11, and 1/125s shutter for spot-on exposures every time. A rock-solid tripod is non-negotiable-it keeps things steady and repeatable, especially for big catalogs. Aim for one that stretches to about 6 feet for easy adjustments.
Lighting is where the drama comes in: softboxes, strip lights, or LED panels pumping 5000–8000 lumens from the sides add that essential depth and avoid the pancake-flat look from straight-on blasts. Keep them 4–6 feet away for smooth coverage. A seamless white or pale grey backdrop (10×20 feet works great) keeps eyes on the clothes, not the mess behind.
Don’t forget your styling toolkit-steamer, lint roller, pins, tape, clips, and padding-to make everything hug the form just right. For colors that pop true-to-life, manual white balance and a color checker card (like the X-Rite for under $100) are your best friends, ensuring every shot matches across the board.
Studio Setup & Camera Placement
- Tape down your spots for the tripod, lights, and mannequin-it’s the secret to identical framing shot after shot.
- Height-wise, eye-level to the chest for tops, hips for bottoms, mid-torso for dresses keeps distortion at bay.
- Lights at 45 degrees, fully diffused, with fill or reflectors to tame shadows (aim for a 3:1 light-to-shadow balance), and you’re golden.
Garment Preparation & Styling Excellence
Before the camera even wakes up, your clothes need some TLC-it’s the difference between “meh” and “must-have.”
Quick Win: Give each piece a good steam or iron; those wrinkles scream amateur and can tank your sales vibe. Budget 5–10 minutes per item to get it crisp.
Then, hit it with the lint roller to banish every speck of dust or thread-nothing kills polish faster. Now, the fun part: dressing the mannequin. Tug hems, collars, and sleeves into place, using your camera’s grid to nail that perfect symmetry.
Add pins, tape, or padding (think breast forms or sleeve stuffers) to give it natural volume, like it’s got a real body underneath. And sleeves? Pin them just so-no peeking linings or floppy disasters.
Professional Shooting Workflow
Shooting smart means covering all bases without wasting time-it’s about flow, not frenzy. Nail this, and post-production becomes a dream.
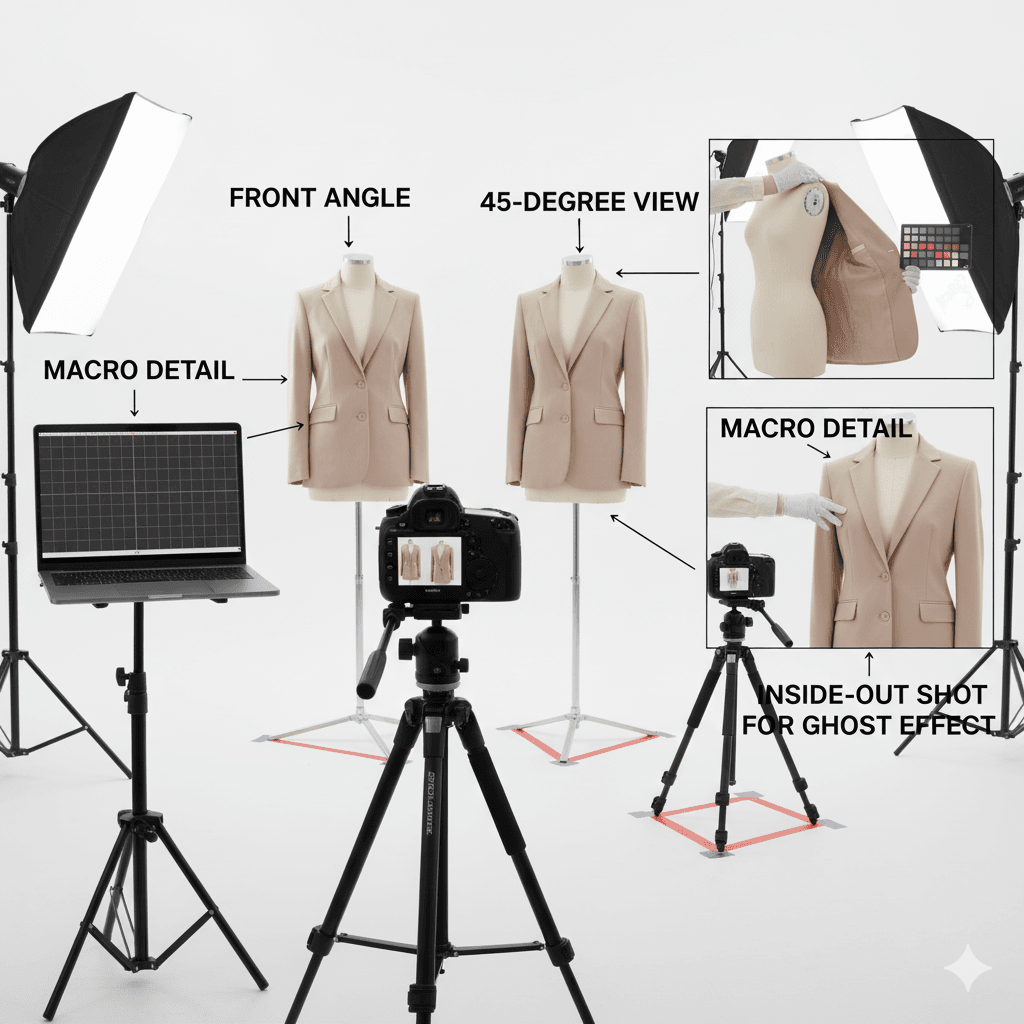
Coverage Checklist
- Hit the essentials: front, back, sides, and those 45-degree angles that add life-6–8 shots per piece should cover you.
- Zoom in for close-ups on buttons, textures, tags, or embroidery; go macro 1:1 to really showcase the details.
- For the ghost effect, flip the garment inside-out and snap the hidden bits like necklines or cuffs, keeping lights and camera exactly the same for easy blending later.
- Lock your settings manual-exposure, white balance-to keep brightness and tones uniform. It’s the glue that holds your catalog together.
Shooting Tips
Batch it: same setup for everything, and you could knock out 20–30 items an hour. Shiny or bumpy fabrics? Bring lights in closer and bigger for softer diffusion-no glare, no deep shadows ruining the mood.
Advanced Lighting & Color Workflow for Accuracy

In ecommerce, if the colors are off, so is everything-buyers bounce. So let’s lock in that fidelity with some pro habits.
- Jot a quick lighting diagram of your rig; it’ll make recreating it a snap next time, and toss in fill light if shadows get too moody.
- Kick off batches with a color checker snap, tweaking manually to 5500K for that daylight feel-no auto surprises here.
- And editing? Only on a calibrated monitor-grab a Datacolor Spyder and check it monthly to match what you see to what shoppers get.
Post-Production & Creating the Ghost Mannequin Effect
This is where the wizardry happens-raw shots turn pro in Photoshop or your tool of choice. Start by zapping dust bunnies, stray threads, and tiny wrinkles; 5–15 minutes per image keeps it fresh.
Then, layer in those inside-out pieces for the neck or cuffs-it crafts that hollow, 3D float without the mannequin stealing the show. Mask out the form cleanly (or let automation help), cap it with a crisp white background, and maybe a whisper of shadow at 10–20% opacity for grounding.
For speed, actions and templates handle the crop, horizon, and uniformity-whip through 50–100 images in under two hours.
Output Standards for Ecommerce Product Pages
Final files need to load fast and play nice with platforms-it’s not just pretty pictures, it’s performance.
“Round out with front, back, sides, macros, and any inners. JPEG or PNG at 2000×2000 pixels, squeezed under 200KB each for zippy UX and SEO love.”
- Name them smart with keywords, add alt text that’s descriptive and accessible.
- Stick to pure white or neutral backs-double-check your marketplace’s rules to stay compliant.
Troubleshooting & Handling Special Cases
Stuff happens-even pros hit snags. Here’s how to smooth them out quick.
Issue | Solution |
|---|---|
Wrinkles or Misalignment | Re-style with grids and prep; clone stamp the little fixes in edit. |
Sleeve Collapse or Awkward Fit | Padding, tape, or wires hold the line-test on a couple samples first. |
Reflection or Banding | Bump diffused lights closer (2–3 feet) or layer up the diffusion. |
Color Inaccuracy | Re-shoot manual or raw-correct; keep delta E under 2 for spot-on. |
In-House vs. Outsourcing Professional Retouching
Editing’s a fork in the road: do it yourself for control, or hand off for scale?
- Outsource when: Cranking 500+ images a month, tight on deadlines, or juggling brands-pros are efficient at $0.50–$2 a pop.
- In-house for: Smaller gigs under 100? Keep it personal.
Bottom line: balance speed, consistency, cost, and how much say you want in the creative end.
Frequently Asked Questions (FAQ)
Got questions? We’ve got answers-these cover the big ones.
- What is ghost mannequin photography? It’s that slick multi-step dance of outer shots, inner flips, and digital vanishing acts, creating clothes that hover in perfect 3D form.
- Is a mannequin strictly required? For ghost work, yep-it gives the shape; flat lays work for basics, but nothing beats the pro uniformity of a form.
- How do I achieve true colors? Manual tweaks, checker shots per batch, and a calibrated screen-simple as that for dead-on fidelity.
- How do you handle tricky fabrics? Custom lights, smart padding, and styling, plus extra post love for sheers or shinies-might add 20–30% time, but worth it.
Printable Shot List & Pre-Shoot Checklist
Print this out and tape it to your wall-no more forgetting the details.
- Prep garments: steam, lint-roll, style
- Mark spots: tripod, lights, mannequin
- Check and set: camera, lighting
- Shoot mains and details: per SKU
- Grab inners: for ghost magic
Conclusion:
At its heart, great mannequin photography isn’t just steps-it’s the spark that makes your ecommerce clothes irresistible. Follow this workflow, blending ghost tricks with solid post tweaks, and watch your catalog shine, trust build, and sales climb.
“Need that extra polish for batches? Pro retouchers are a click away for marketplace-ready perfection.”
Curious about dialing in monitor calibration for flawless colors? Let me know-we can dive deeper.