Let’s be honest: when you start selling products online, the pressure to make them look amazing is real. But here’s the secret that professional photographers won’t always tell you upfront you don’t need a $3,000 camera to take stunning product photos.
In fact, some of the most successful Etsy sellers and Amazon merchants started with nothing more than a smartphone, a window, and a piece of white foam board.
The truth is, lighting and composition matter far more than your camera body. A $50 lighting setup can make a smartphone photo look like it was shot on a DSLR, while poor lighting will make even the most expensive gear look amateurish.
This guide breaks down exactly what you need to get started, categorized by budget and necessity. We’ll skip the jargon and focus on what actually moves the needle for your business.
1. Cameras: Start With What You Have
The Smartphone Advantage
If you own a smartphone made in the last three years (iPhone 12+, Samsung Galaxy S20+, Google Pixel 6+), you already have a capable camera. Modern smartphones use computational photography to produce sharp, well-exposed images that are perfect for:
- Social media content (Instagram, TikTok, Pinterest)
- Basic e-commerce listings
- Lifestyle shots where context matters more than pixel-perfect detail
Pro Tip: Use “Portrait Mode” to simulate a blurred background (bokeh), which helps your product stand out. Just ensure the edge detection is accurate so your product doesn’t look artificially cut out.
When to Upgrade to a Dedicated Camera
You should consider upgrading when:
- You need consistent results across hundreds of product SKUs
- You’re shooting in low-light conditions frequently
- You want full manual control over aperture, shutter speed, and ISO
- You plan to print large-format marketing materials
Top Entry-Level Recommendations (2026)
- Sony α6400 (Mirrorless): The gold standard for beginners. It has an excellent APS-C sensor, fast autofocus, and access to Sony’s massive E-mount lens library. Compact enough to travel with, powerful enough to grow with you.
- Canon EOS R50 (Mirrorless): Incredibly user-friendly with guided menus that teach you as you shoot. Great color science straight out of the camera, meaning less editing time.
- Canon EOS Rebel SL3 / 250D (DSLR): If you prefer the traditional DSLR feel, this is the best budget option. It has excellent battery life and ergonomic controls that make learning manual settings intuitive.
Verdict: Don’t rush to buy a full-frame camera. An APS-C sensor (like those in the cameras above) is more than sufficient for 95% of product photography needs.
2. Lenses: Where Sharpness Lives
If the camera body is the brain, the lens is the eye. Investing in a good lens often yields better results than upgrading your camera body.
The “Nifty Fifty”: Your First Prime Lens
The 50mm f/1.8 lens (available for Canon, Nikon, and Sony) is arguably the best value in photography. Costing between $100–$200, it offers:
- Crisp Sharpness: Far sharper than most kit zoom lenses.
- Beautiful Bokeh: The f/1.8 aperture creates a pleasing background blur that isolates your product.
- Natural Perspective: On a crop-sensor camera, it acts like a 75mm lens, which is ideal for medium-sized products like shoes, handbags, or electronics.
Macro Lenses: For the Small Stuff
If you’re selling jewelry, watches, skincare bottles, or anything with intricate textures, a macro lens is non-negotiable. It allows you to focus extremely close while maintaining sharpness across the entire subject.
Top Budget Macro Picks:
- Sigma 70mm f/2.8 DG Macro Art: Professional-grade sharpness at an entry-level price.
- Sony FE 50mm f/2.8 Macro: Lightweight and compact, perfect for mirrorless setups.
- Canon EF-S 60mm f/2.8 Macro: Designed specifically for crop-sensor Canon DSLRs.
Shooting Tip: When using a macro lens, stop down your aperture to f/5.6–f/8. This increases the depth of field, ensuring the entire product (not just the front edge) is in focus.
Read more: Best Camera and Lens for Jewelry Photography
3. Lighting: The Make-or-Break Factor
Good lighting is the single most important element of product photography. Bad lighting makes expensive products look cheap; good lighting makes cheap products look premium.
Option A: Natural Light (Free & Beautiful)
You don’t need artificial lights to start. A large window providing indirect sunlight is one of the best light sources available.
How to Set It Up:
- Place a table next to a large window (north-facing windows provide the most consistent light).
- Avoid direct sunlight, which creates harsh shadows. Shoot on overcast days or use a sheer white curtain to diffuse the light.
- Position your product 2–3 feet from the window to reduce contrast.
Limitation: Natural light changes throughout the day and depends on weather, making it hard to maintain consistency for large catalogs.
Option B: Continuous LED Lights (Highly Recommended)
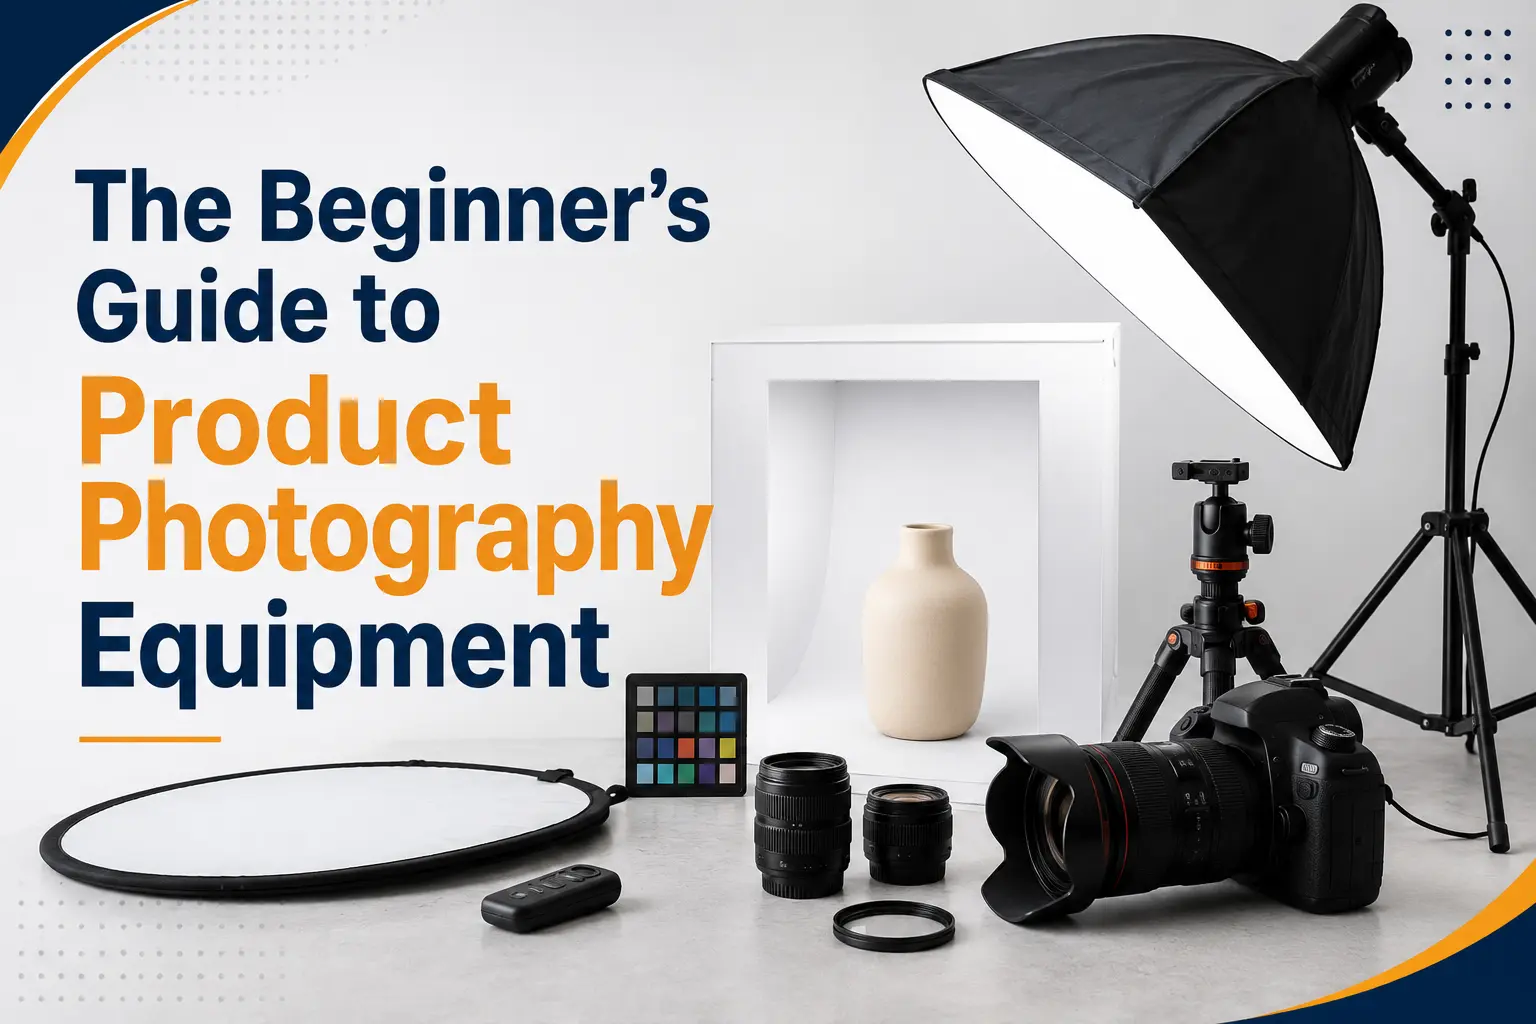
For beginners, continuous LED lights are superior to studio strobes (flashes) because “what you see is what you get.” You can adjust the brightness and position in real-time and see the effect immediately on your screen.
Top Pick: Godox SL60W
- Price: ~$80–$120
- Why It’s Great: 60W output is powerful enough for most small-to-medium products. It’s daylight-balanced (5600K), meaning colors look natural without complex white balance adjustments. It’s also compatible with standard light modifiers like softboxes and umbrellas.
Color Temperature Rule: Always set your lights to 5000K–5600K (daylight). Never mix color temperatures (e.g., don’t combine window light with warm tungsten bulbs), as this creates unnatural color casts that are difficult to fix in post-production.
4. Light Modifiers: Shaping the Light
A bare light bulb creates harsh, unflattering shadows. Modifiers soften and shape the light to wrap around your product.
Softboxes
A softbox is a box with a diffusive front panel that turns a point light source into a large, soft light source.
- Recommendation: Pair your Godox SL60W with a 24″x24″ or 30″x30″ softbox. This size is manageable for home studios and provides beautiful, even illumination.
Umbrellas
White shoot-through umbrellas are affordable, portable, and versatile. They create a soft, natural look that works well for most products. They’re slightly less controlled than softboxes but much easier to set up and store.
5. Reflectors: The Secret to Balanced Light
Even with great main lighting, your product will have dark shadows on the side opposite the light source. Reflectors bounce light back into these shadows, creating a balanced, professional look.
The DIY Hero: White Foam Board
You don’t need expensive gear here. Head to any craft store and buy a white foam core board for $1–$5.
- How to Use: Place it opposite your main light source. It will bounce soft, white light back onto the shadow side of your product, filling in details without creating new harsh shadows.
The Pro Upgrade: 5-in-1 Collapsible Reflector
Brands like Neewer sell collapsible reflectors for $15–$25 that include:
- White: Soft, natural fill light (most useful for products).
- Silver: Brighter, cooler fill light for added punch.
- Gold: Warms up shadows (use sparingly; can look unnatural on products).
- Black: Absorbs light to create deeper, dramatic shadows.
- Translucent: Acts as a diffuser if placed between the light and product.
6. Stability: Tripods Are Non-Negotiable
Camera shake is the enemy of sharpness. Even the steadiest hands introduce micro-movements that blur images, especially in lower light or when using macro lenses.
Why You Need a Tripod
- Sharpness: Eliminates camera shake for crisp, detailed images.
- Consistency: Keeps your framing identical across multiple products, which is crucial for e-commerce catalogs.
- Low Light: Allows you to use slower shutter speeds without blur, letting you keep your ISO low for cleaner images.
- Focus Stacking: Essential for macro work, where you take multiple shots at different focus points and combine them later.
Recommendations:
- Manfrotto Travel Tripod: Lightweight, sturdy, and reliable.
- Neewer Carbon Fiber Tripod: A budget-friendly alternative that still offers good stability.
- Smartphone Mount: If you’re shooting with a phone, get a sturdy metal adapter (like the Neewer Smartphone Holder) to attach it securely to the tripod.
Pro Tip: Use a remote shutter release or your camera’s 2-second timer to avoid vibrating the camera when you press the shutter button.
7. Backgrounds: Keep It Clean
A distracting background pulls attention away from your product. The goal is simplicity.
Seamless Paper Backdrops
A roll of seamless paper provides a clean, continuous background with no wrinkles or seams.
- Colors to Start: White (required for Amazon and many marketplaces), beige, light gray, and black.
- Brands: Clubbackdrops.com, Savage Universal, or ProPhotoStudio offer high-quality options.
DIY Backgrounds
- Poster Boards: Cheap, available in endless colors, and easy to replace if they get dirty.
- Textured Vinyl Sheets: You can buy vinyl sheets that mimic marble, wood, or concrete for a lifestyle aesthetic without the weight and mess of real materials.
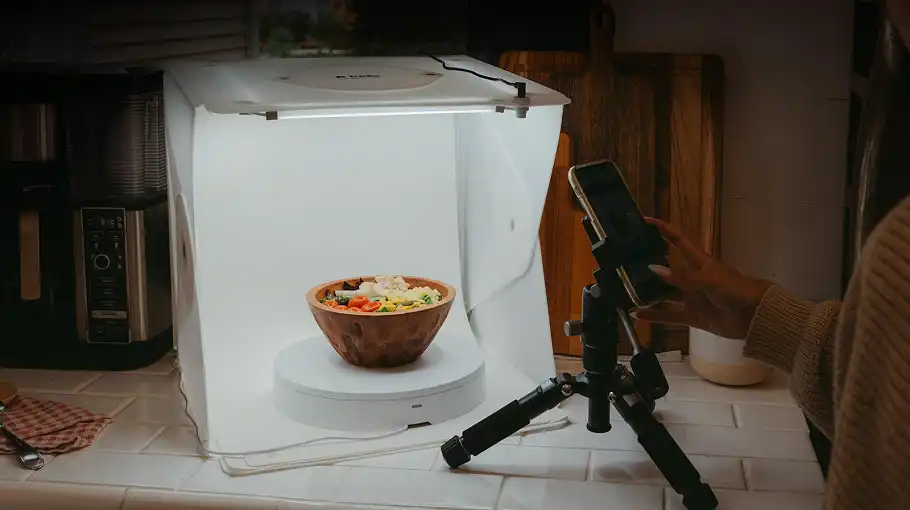
- Light Tents: For small items like jewelry or cosmetics, a $20–$50 light tent eliminates shadows entirely and provides a pure white background.
Complete Beginner Setup Examples
Tier 1: The “Zero to Low” Budget ($0–$50)
- Camera: Your existing smartphone
- Light: Window natural light
- Modifier: White foam board ($2)
- Background: White poster board ($1)
- Support: Phone tripod mount ($15) + basic tripod ($30)
- Best For: Social media, Etsy starters, testing product viability.
Tier 2: The “Serious Starter” Budget ($300–$500)
- Camera: Used Canon Rebel SL3 or Sony α6400 ($350–$450)
- Lens: 50mm f/1.8 prime lens ($100–$150)
- Light: Godox SL60W continuous light ($80)
- Modifier: Small softbox ($30)
- Support: Basic tripod ($40)
- Background: Seamless white paper ($20)
- Best For: Professional e-commerce listings, consistent catalog work.
Tier 3: The “Prosumer” Setup ($800–$1,200)
- Camera: New Canon EOS R50 or Sony α6400 ($600–$700)
- Lens: Sigma 70mm f/2.8 Macro lens ($400)
- Light: Godox SL60W + softbox + light stand ($150)
- Support: Manfrotto tripod ($100)
- Background: Multiple seamless rolls + textured vinyls ($40)
- Software: Adobe Lightroom subscription ($10/month)
- Best For: High-volume sellers, luxury products, detailed macro work.
Common Mistakes to Avoid
- Mixing Color Temperatures: Don’t combine window light (cool/daylight) with indoor lamps (warm/tungsten). Stick to one light source type.
- Shooting in Auto Mode: Learn to use Manual or Aperture Priority mode. Auto mode often exposes for the background, leaving your product underexposed.
- Ignoring Lens Cleanliness: A smudged lens ruins sharpness. Keep a microfiber cloth and air blower handy.
- Skipping the Tripod: Handheld shots are rarely sharp enough for professional e-commerce. Invest in stability early.
- Overcomplicating Lighting: Start with one light + one reflector. Master that before adding more lights. Complexity doesn’t equal quality.
Quick-Start Action Plan
- Week 1: Master natural light. Set up a window station with a foam board reflector. Shoot 10 products using only your smartphone.
- Week 2: If budget allows, purchase an entry-level mirrorless camera and a 50mm f/1.8 lens. Learn the exposure triangle (ISO, Aperture, Shutter Speed).
- Week 3: Invest in a Godox SL60W and a softbox. Learn to position your light at a 45-degree angle to your product.
- Week 4: Build your backdrop collection. Buy white, beige, and one textured surface. Practice swapping backgrounds to see how they affect your product’s mood.
- Month 2: If shooting small items, add a macro lens and learn focus stacking. Upgrade to a sturdier tripod if needed.
Equipment gets you a usable frame. What turns it into a listing image — background, shadow, crop, consistent colour — is eCommerce photo editing.
Final Thoughts
Product photography is a skill, not just a gear game. The best equipment in the world won’t save poor lighting or bad composition. Start simple, master the fundamentals of light and stability, and upgrade only when you hit a specific limitation.
Your customers care about how your product looks, not what camera you used to shoot it. So grab that foam board, find a good window, and start shooting. You’ve got this.