Ghost mannequin photography is the shot that sells clothing online. The garment holds the shape of a body, the neck opening shows the inside of the collar, and nothing distracts from the product. It is also the single most requested edit in apparel eCommerce — and the one AI image tools find hardest to do properly.
The prompts below are written for that specific job. Each one describes a real ghost mannequin task the way a retoucher would brief it, so the model has something to aim at instead of guessing. Copy any of them into ChatGPT, Gemini, Midjourney or the AI editor built into your product-photo tool, swap in your garment, and you will get noticeably closer to a listing-ready image than a one-line request will ever get you.
Please read this before you scroll: the images in this article are not AI output.
Every before and after on this page is real client work, edited by hand by the retouchers at Pixel Retouching. We have used our own portfolio deliberately, because we would rather show you the standard these prompts are aiming at than show you fifteen AI attempts and call them finished.
So treat the sliders as the target, not as a promise. A good prompt will get a simple garment surprisingly close to what you see here. It will not get a complex one all the way there — and the notes under each prompt tell you exactly where the gap usually opens up.
How to get the most out of these prompts
Three things make the difference between a prompt that works and one that produces a nice picture of the wrong thing:
Always supply your own photo. These are editing prompts, not generation prompts. Upload the garment you actually shot — on a mannequin, on a hanger, or flat — and ask the model to transform it. A model asked to invent a hoodie from nothing will invent one, and it will not be yours.
Name what must be visible, not just what must go. “Remove the mannequin” leaves the model free to close the neck opening entirely. “Show the inside of the collar, the shoulder seam and the care label” gives it something to build.
Change one thing at a time. If the output is close but the hem is wrong, re-prompt only the hem. Rewriting the whole prompt usually moves everything, including the parts that were already right.
1. Basic ghost mannequin from a hanger shot
Before
After
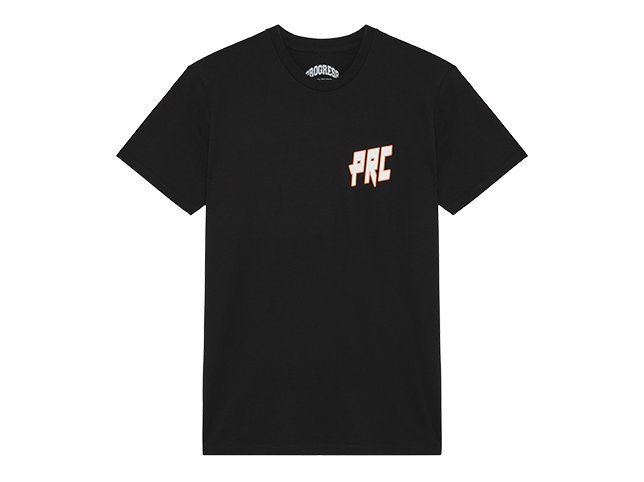
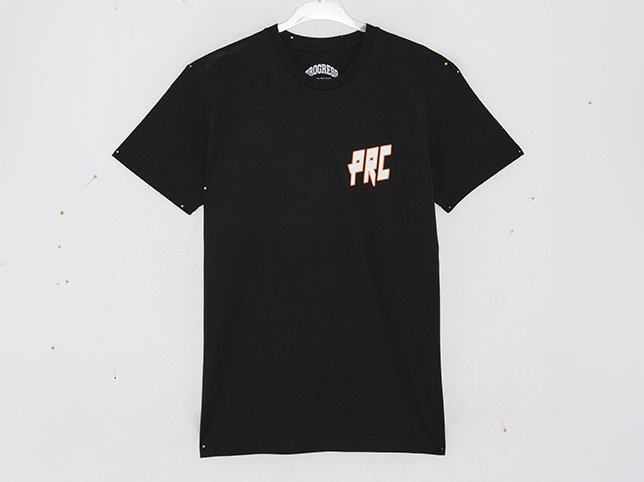
Hanger removed, neck opening rebuilt, background cut to pure white. Drag to compare.
Turn this photo into a professional ghost mannequin product image. Remove the hanger and anything supporting the garment completely. Keep the t-shirt hollow and three-dimensional, holding the shape of a body that is not there. Rebuild the neck opening so the inside of the collar, the shoulder seam and the printed care label are clearly visible. Keep the existing fabric colour, weave and chest print exactly as photographed. Pure white background, RGB 255, 255, 255. Soft even studio lighting, no colour cast.
What to watch for: the inside of the collar. A model has never seen the inside of your t-shirt, so it draws a generic one — often with a label that says nothing, or says something that is not your brand. Zoom in before you publish.
2. Collar reconstruction on a buttoned shirt
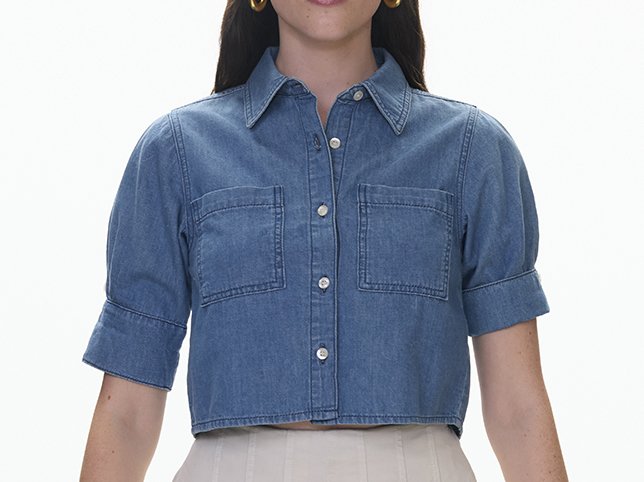
Before
After
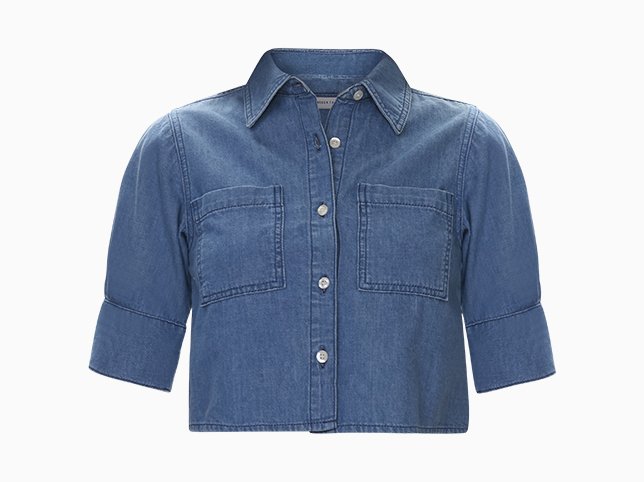
A collar has a stand, a fold and an underside. All three have to survive the edit.
Convert this shirt into a ghost mannequin image. Remove the mannequin entirely while keeping the garment three-dimensional and worn-looking. Rebuild the collar so the collar stand, the fold line and the underside of the collar are all visible, with the correct thickness where the two layers meet. Keep the button placket straight and every button in its photographed position. Preserve the denim weave and the topstitching colour. Pure white background, soft directional light from the upper left.
What to watch for: button spacing. Models redistribute buttons evenly when they redraw a placket, which quietly changes a shirt a customer is about to buy. Count them against your original.
3. Blazer with a visible lining
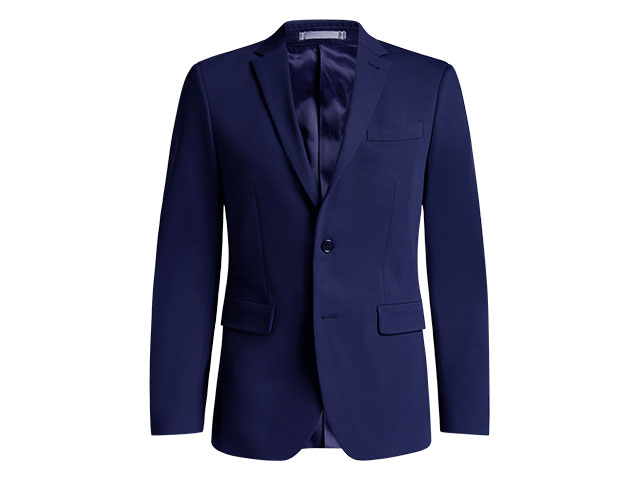
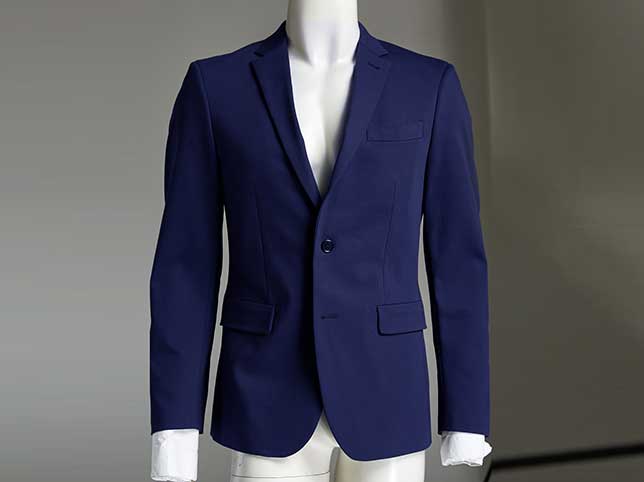
Before
After
Tailoring is the hard case: lapels, lining and an open front all in one frame.
Create a ghost mannequin image of this tailored blazer. Remove the mannequin and keep the jacket open at the front, holding the shape of shoulders and a chest. Show the satin inner lining down both front panels and across the inside of the collar, with a soft sheen that reads as satin rather than as matte fabric. Keep both lapels symmetrical and the notch at the same height on each side. Preserve the wool texture, the button placement and the pocket flaps. Pure white background, even studio light.
What to watch for: lapel symmetry and the lining sheen. This is where generated tailoring falls apart fastest — one notch sits higher than the other, or the lining renders as flat colour with no highlight at all.
4. Sleeve joint on outerwear
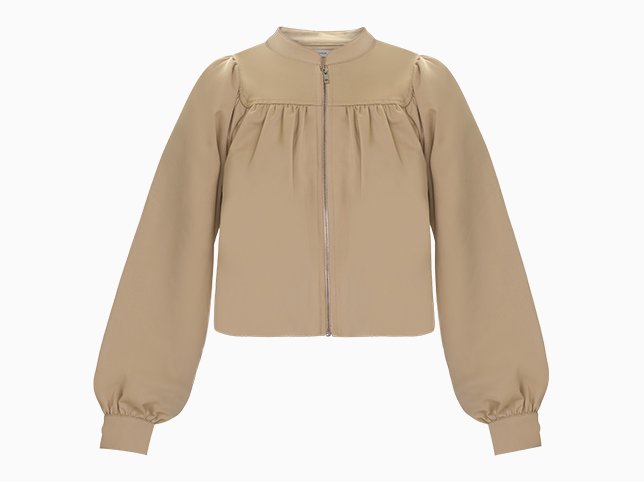
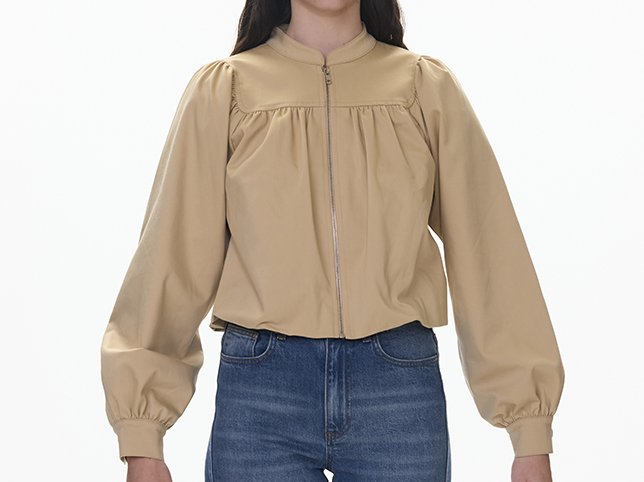
Before
After
Cuffs have to read as openings, not as sealed ends.
Turn this jacket into a ghost mannequin product shot. Remove the mannequin arms and body. Rebuild both cuffs as open sleeve ends showing the inner fabric, so each sleeve reads as hollow rather than sealed. Keep the sleeves the same length as each other and in the position they were photographed. Preserve the zip, the hardware finish and the seam lines. Pure white background, soft even light with no hotspots on the fabric.
What to watch for: sleeve length. If the model rebuilds both cuffs independently it will frequently make one sleeve slightly longer, which is invisible on screen until a customer compares it to the garment that arrives.
5. Bottom joint on trousers
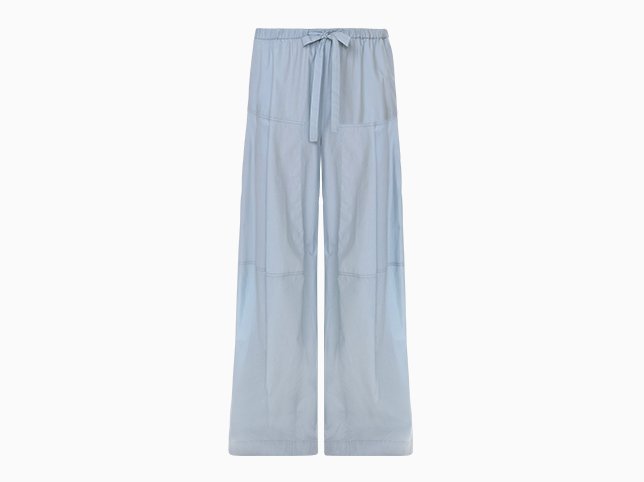
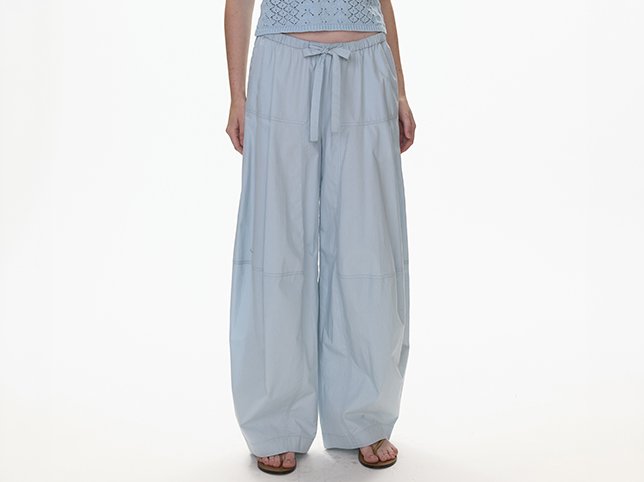
Before
After
Bottoms have two openings to rebuild and a drape that has to stay believable.
Create a ghost mannequin image of these trousers. Remove the mannequin legs and stand. Rebuild the waistband as an open ring showing the inside of the waist facing, and rebuild both leg hems as open ends showing the inner fabric. Keep the leg width, the break of the fabric and the crease lines exactly as photographed. Preserve the belt loops, the fly and the pocket openings. Pure white background, soft light, a faint natural shadow directly beneath the hems.
What to watch for: the waistband ring. Generated waistbands often come back as a flat oval with no thickness, which makes the whole garment look printed rather than photographed.
6. A skirt, where there is no neckline to anchor to
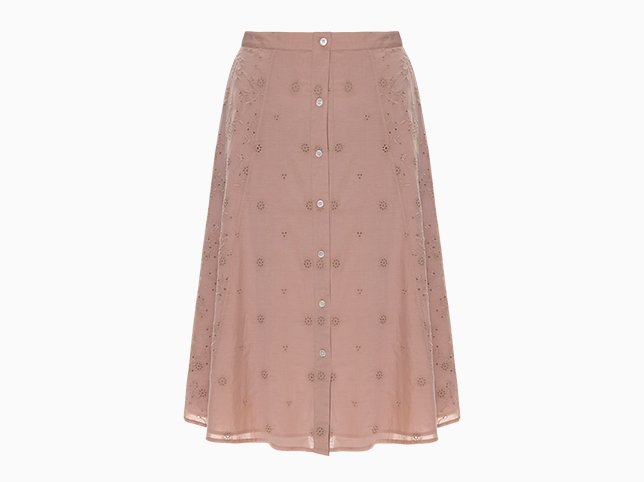
Before
After
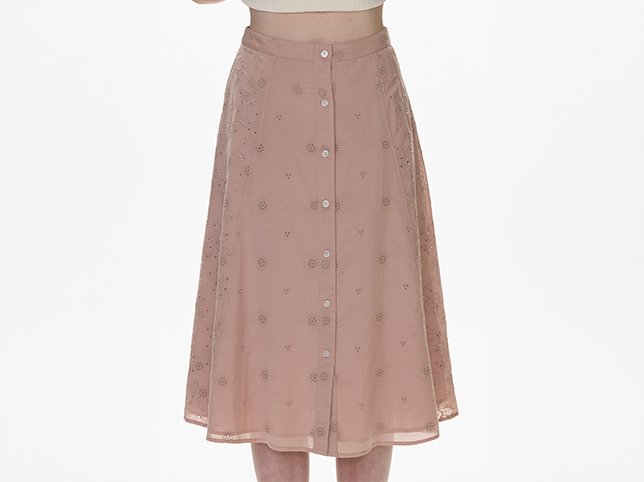
With no collar to rebuild, everything rests on the waistband and the fall of the fabric.
Turn this skirt into a ghost mannequin product image. Remove the mannequin completely. Rebuild the waistband as an open ring with visible inner fabric and a clear sense of depth, so the skirt reads as hollow at the top. Keep the pleats, the hem line and the way the fabric falls exactly as photographed — do not straighten or re-drape it. Preserve the colour precisely; this is a specific pink and it must not shift. Pure white background, soft even light.
What to watch for: colour drift. Saturated pinks, corals and reds are the shades AI most often nudges, and a skirt that photographs one colour and arrives another is a return.
7. Black fabric on a white background
Before
After
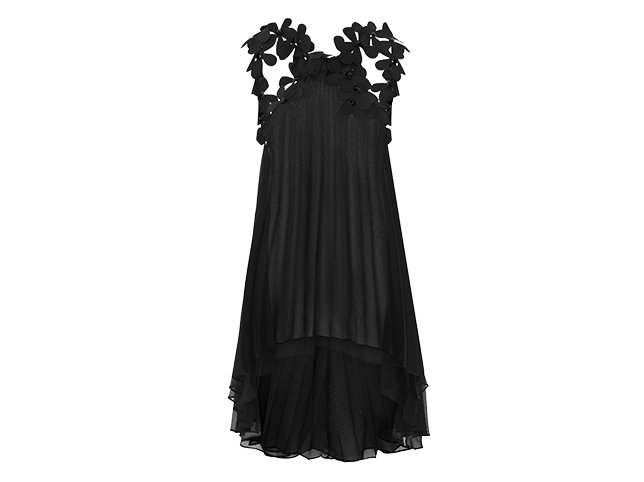
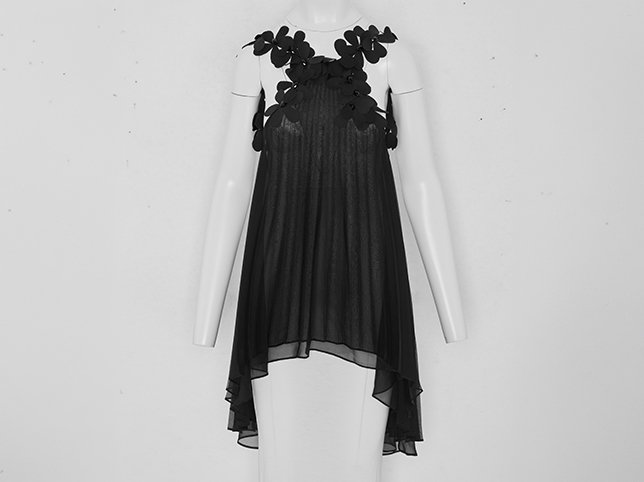
Black on white is a contrast problem before it is an editing problem.
Create a ghost mannequin image of this black dress. Remove the mannequin and keep the garment hollow at the neckline, showing the inside of the back panel. Keep the black fabric readable: preserve the seam lines, darts and hem stitching rather than letting the garment flatten into a single black silhouette. Do not lift the shadows so far that the black turns grey. Pure white background with a clean edge all the way around the garment.
What to watch for: detail loss in the darks. The usual failure is a clean cut-out of a black shape with every seam gone — technically a ghost mannequin, commercially useless.
8. A deep neckline that shows the back of the garment
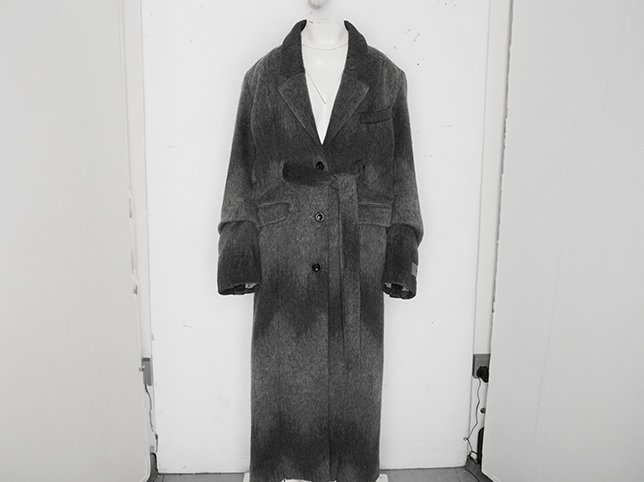
Before
After
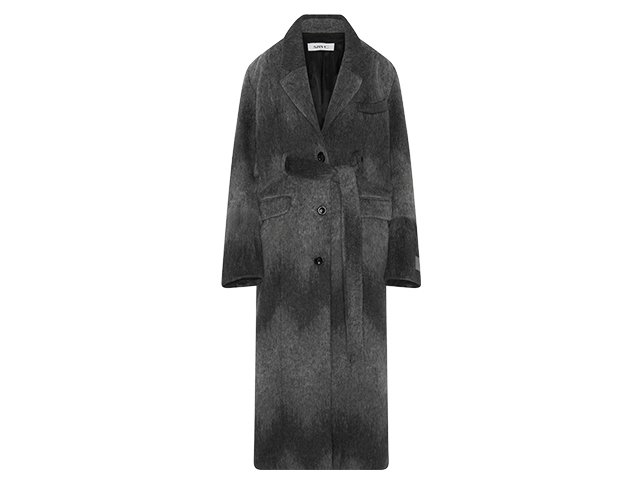
The deeper the neckline, the more of the inside the shot has to explain.
Turn this V-neck dress into a ghost mannequin image. Remove the mannequin. Through the open V, show the inside of the back panel of the dress at the correct distance behind the front, so the neckline reads as a real opening with depth rather than a hole. Keep the V symmetrical and at the photographed depth. Preserve the shoulder seams and the fabric drape. Pure white background, soft even studio lighting.
What to watch for: depth. Get this wrong and the back panel sits flush with the front, which reads instantly as fake even to a customer who could not say why.
9. Lace and semi-sheer fabric
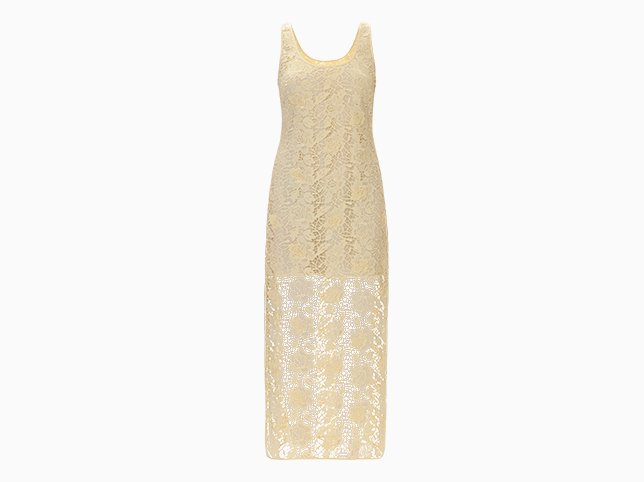
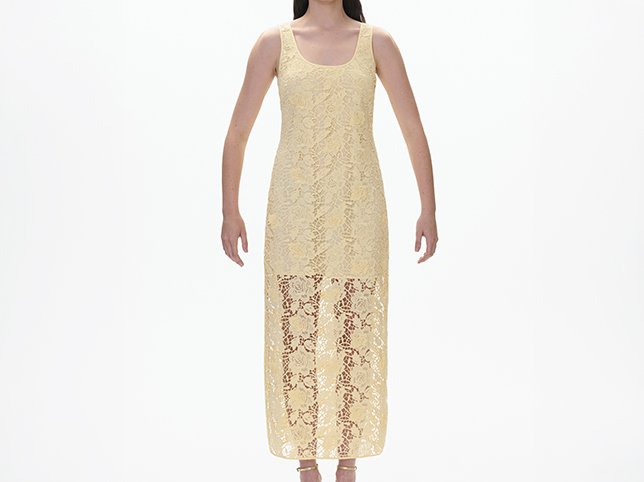
Before
After
Lace is where a cut-out stops being a cut-out and becomes real retouching.
Create a ghost mannequin image of this lace dress. Remove the mannequin without simplifying the lace. Keep every part of the lace pattern intact, including the areas where the background shows through the fabric, and keep the scalloped edges exactly as they are. Where the lace was semi-transparent over the mannequin, it should now be semi-transparent over the white background. Do not paint solid fabric behind the lace. Pure white background, soft even light.
What to watch for: invented lace. When the model cannot resolve the pattern it generates a substitute one that looks plausible and is not the lace you are selling. Compare a corner at 100% before you publish.
10. Velvet and other light-absorbing fabrics
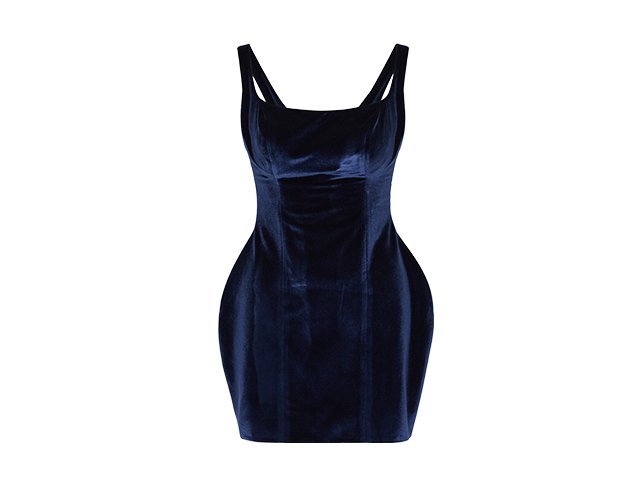
Before
After
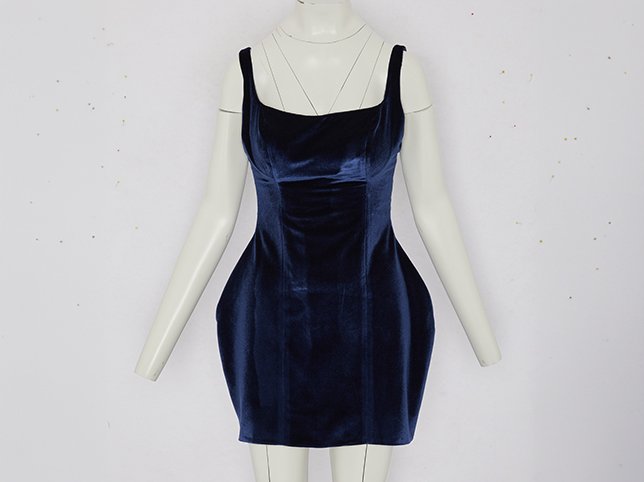
Velvet is a texture that only exists in the highlights. Flatten those and it becomes felt.
Turn this velvet dress into a ghost mannequin product image. Remove the mannequin and rebuild the neck opening. Preserve the velvet pile: keep the direction of the nap and the soft highlight where the light catches it, so the fabric still reads as velvet and not as flat matte cloth. Do not increase contrast or clarity across the garment. Keep the colour depth exactly as photographed. Pure white background, soft broad light source.
What to watch for: the nap. Velvet, corduroy, suede and brushed wool all depend on directional highlights, and models routinely smooth them into a single tone. If your fabric is the selling point, check it first.
11. A full three-dimensional neck joint
Before
After
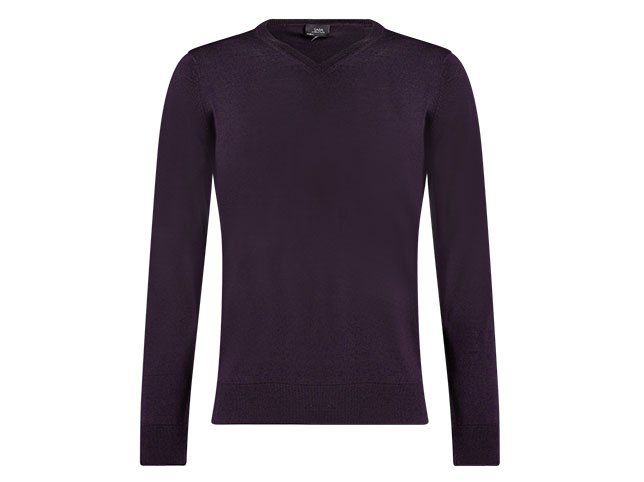
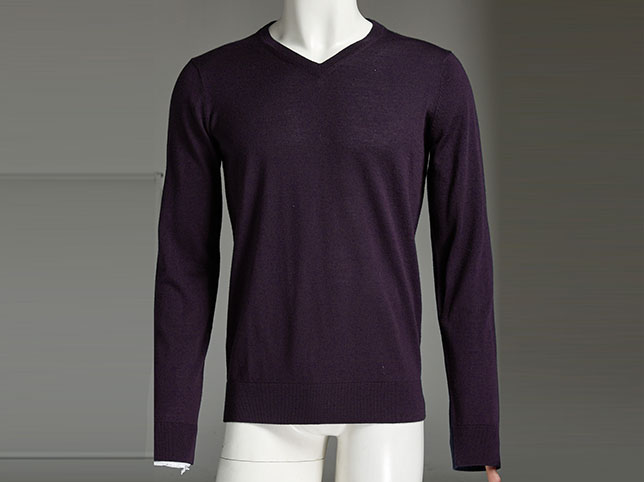
A 3D neck joint composites a second photograph of the garment’s interior into the first.
Create a three-dimensional ghost mannequin neck joint for this garment. Remove the mannequin. Through the neck opening, show the inside of the back of the garment, the inner shoulder seams on both sides and the inside of the collar band, all at the correct perspective and depth for the camera angle of this photo. The interior should be slightly darker than the exterior, as it would be in real light. Keep the outer garment untouched. Pure white background.
What to watch for: perspective. A real 3D neck joint is built from a second photograph of the same garment shot from inside. AI has only the one image, so it estimates — and the estimate is usually lit from the wrong direction.
12. Rebuilding the back of a garment
Before
After
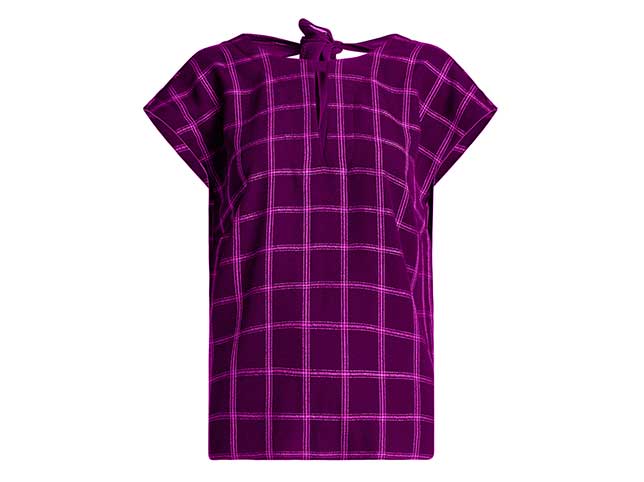
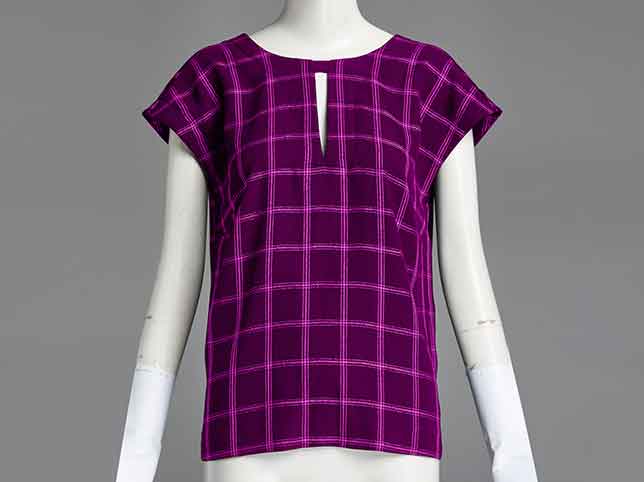
The back panel is a separate shot in real production. AI has to guess at it.
Produce a ghost mannequin image of this garment with the back panel visible through the neck opening. Remove the mannequin. Insert the rear inside of the garment so it is visible below the collar, matching the fabric colour, weave and lighting of the front exactly. The join between the front opening and the inserted back must be seamless, with no visible edge or halo. Pure white background, even studio light.
What to watch for: the halo. The join is the single most common giveaway — a faint light or dark rim where the inserted panel meets the collar. Look along the whole neckline, not just at the centre.
13. Consistency across a product grid
Before
After
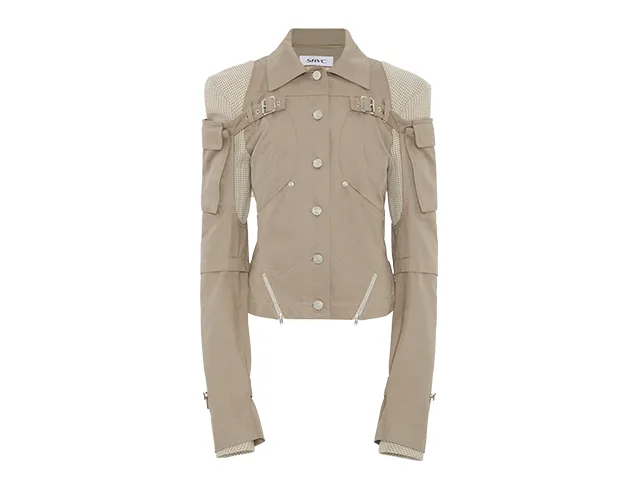
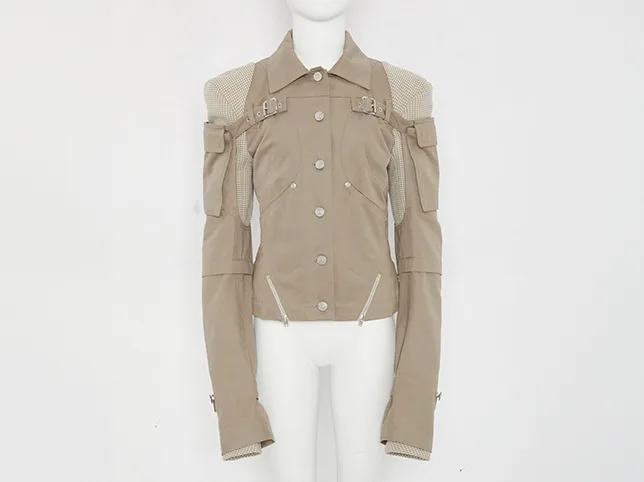
One good image sells a garment. Forty matching ones sell a collection.
Turn this garment into a ghost mannequin product image built for a category grid. Remove the mannequin and rebuild the neck opening. Place the garment centred in the frame, occupying 85 percent of the height, with equal white margin on the left and right. Pure white background, RGB 255, 255, 255. Neutral white balance and the same soft frontal lighting for every image in this set. Do not crop the hem or the sleeves.
What to watch for: drift across a batch. Each generation is independent, so garment ten sits slightly larger or brighter than garment one. Lay the whole grid out at thumbnail size before you upload — that is where mismatch shows.
14. Straightening a garment that was not hung square
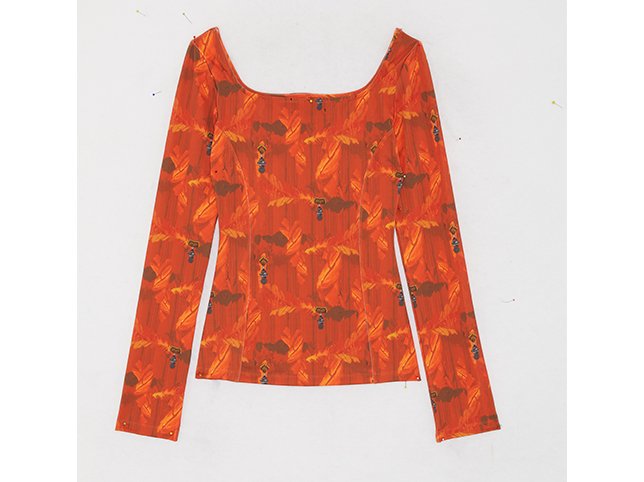
Before
After
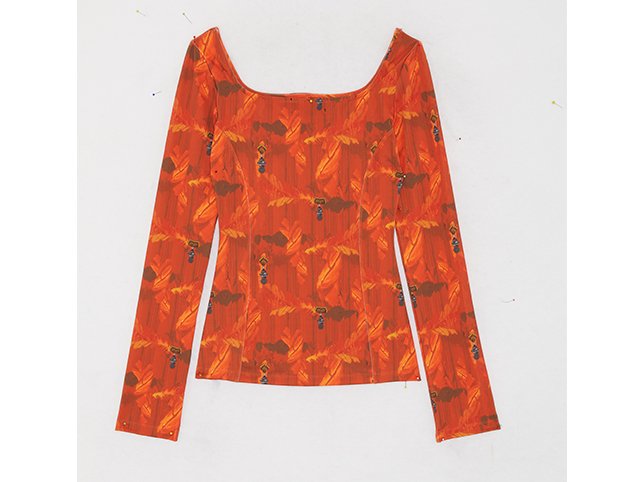
Symmetry is the edit customers never notice and always feel.
Straighten and balance this garment for an eCommerce listing. Level the shoulders so both sit at the same height. Make the left and right sleeves the same length and angle. Centre the collar and the front placket on the vertical axis of the garment. Correct the alignment only — do not change the cut, the proportions, the fabric or the colour, and do not slim the garment. Pure white background, even light.
What to watch for: quiet reshaping. Asked to “improve” a garment, models tend to narrow the waist and lengthen the body. The word only in that prompt is doing real work; keep it.
15. Adding a natural shadow
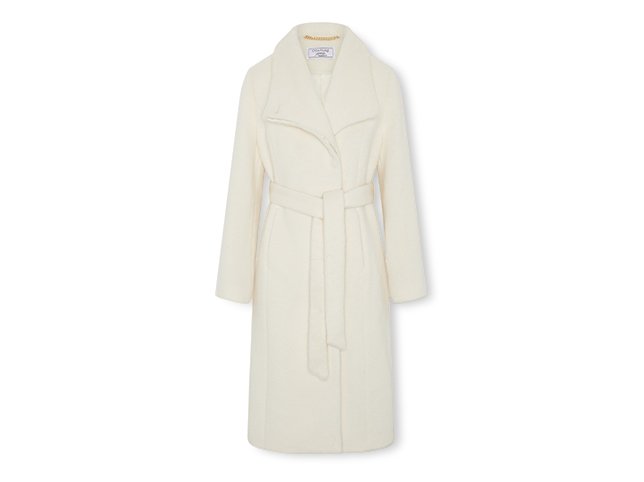
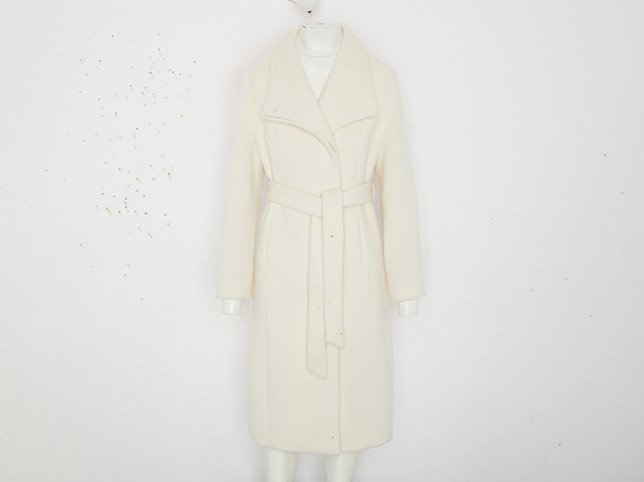
Before
After
Without a shadow the garment floats. With the wrong one, it hovers.
Add a natural shadow beneath this ghost mannequin garment. The shadow should sit directly under the lowest point of the hem, be soft-edged, and fade out within a short distance of the garment. Match it to the existing lighting direction in the photo. Keep it light enough that the background still reads as white. Do not add a reflection, a mirrored copy or a hard drop shadow.
What to watch for: shadows that contradict the light. If the garment is lit from the upper left, the shadow belongs to the lower right. Generated shadows are often centred by default, which makes the product look like a sticker.
Where these prompts stop working
Everything above assumes a garment that is reasonably simple to read: solid colour, clear edges, a shape the model has seen thousands of variations of. That covers a great deal of a typical catalogue, and for those pieces a good prompt genuinely saves time.
It stops at the pieces that matter most. In our own work, these are the ones that always come back to a person:
Fine and irregular edges. Fur, feathers, fringing, loose knit, frayed denim, anything with hair. Selection is guesswork at this scale, and the model resolves it by smoothing — which removes the exact texture that justifies the price.
Transparent and reflective materials. Chiffon, organza, sequins, patent leather, anything metallic. What is behind the fabric has to change when the background changes, and a generated version rarely gets that relationship right.
Interiors that must be truthful. Brand labels, care instructions, size tags, hallmarks. A model will produce something label-shaped every time. It will not be your label, and on a marketplace that is a listing problem before it is an aesthetic one.
Anything sold on its detail. Embroidery, beadwork, hand finishing, visible construction. If a customer is paying for the stitching, the stitching cannot be approximated.
Used honestly, that is not an argument against these prompts — it is the case for knowing what they are for. Use them to move quickly through the straightforward eighty percent of a catalogue, and to get much better at describing an edit, which is a skill that pays off whoever ends up doing it. Then send the difficult twenty percent to someone who will open the file and work on it — that is what our ghost mannequin service is for, and you can see the full range of it in the portfolio.
Frequently asked questions
Are the images in this article AI generated?
No. Every before and after here is real client work retouched by hand at Pixel Retouching. We used our own portfolio so you can see the standard these prompts aim at, rather than a set of AI attempts presented as finished results.
Will these prompts give me the same result as the images shown?
On a simple garment, a good prompt will get you close. On a complex one it will not, and the notes under each prompt say where the gap usually opens. Treat the sliders as the target rather than the guaranteed output.
Which AI tool works best for ghost mannequin edits?
Any model that edits an uploaded image rather than generating from text alone. Tools built specifically for product photos tend to handle the background better; general models tend to handle the garment interior better. Test both on one garment before committing a whole catalogue to either.
Can I use AI ghost mannequin images on Amazon?
Amazon judges the image, not how it was made. The requirements are the ones that catch generated images out: a pure white background at RGB 255, the product filling around 85% of the frame, no props, no text and no inaccuracy. Check the background value and the garment details before you upload — there is a separate set of prompts written against Amazon’s main image rules if that is your marketplace.
Why does the neck opening look wrong in my results?
Because the model has never seen the inside of your garment. Name what should be visible — the collar band, the shoulder seams, the back panel, the label — and it has something to build from. It will still be an approximation, which is why the interior is the first place to look before publishing.
Do I still need a retoucher if the prompts work?
For plain garments, often not. For lace, fur, sheer fabric, real labels and anything sold on its detail, yes. The practical approach is to prompt the easy pieces and route the difficult ones to a person, rather than choosing one method for the whole catalogue.
Can I use these prompts for images I already had edited?
Yes, and it is a good way to test a tool. Run a prompt on a garment you already have a finished retouch of, then compare the two at full size. You will learn more about where the tool fails in ten minutes than from any article.
Try it on your own garments
If you would like to see the difference on your own photographs rather than ours, send three images through the free trial and we will edit them by hand and send them back within 24 hours. No card, and you keep the files either way — including the ones you have already run through a prompt.
More prompt libraries
- AI prompts for clothing product photos — the wider apparel set.
- AI prompts for background removal — the edge work behind every ghost mannequin.
- AI prompts for product shadows — what stops a garment floating.
- AI prompts for Shopify and Etsy listings — getting a whole grid to match.