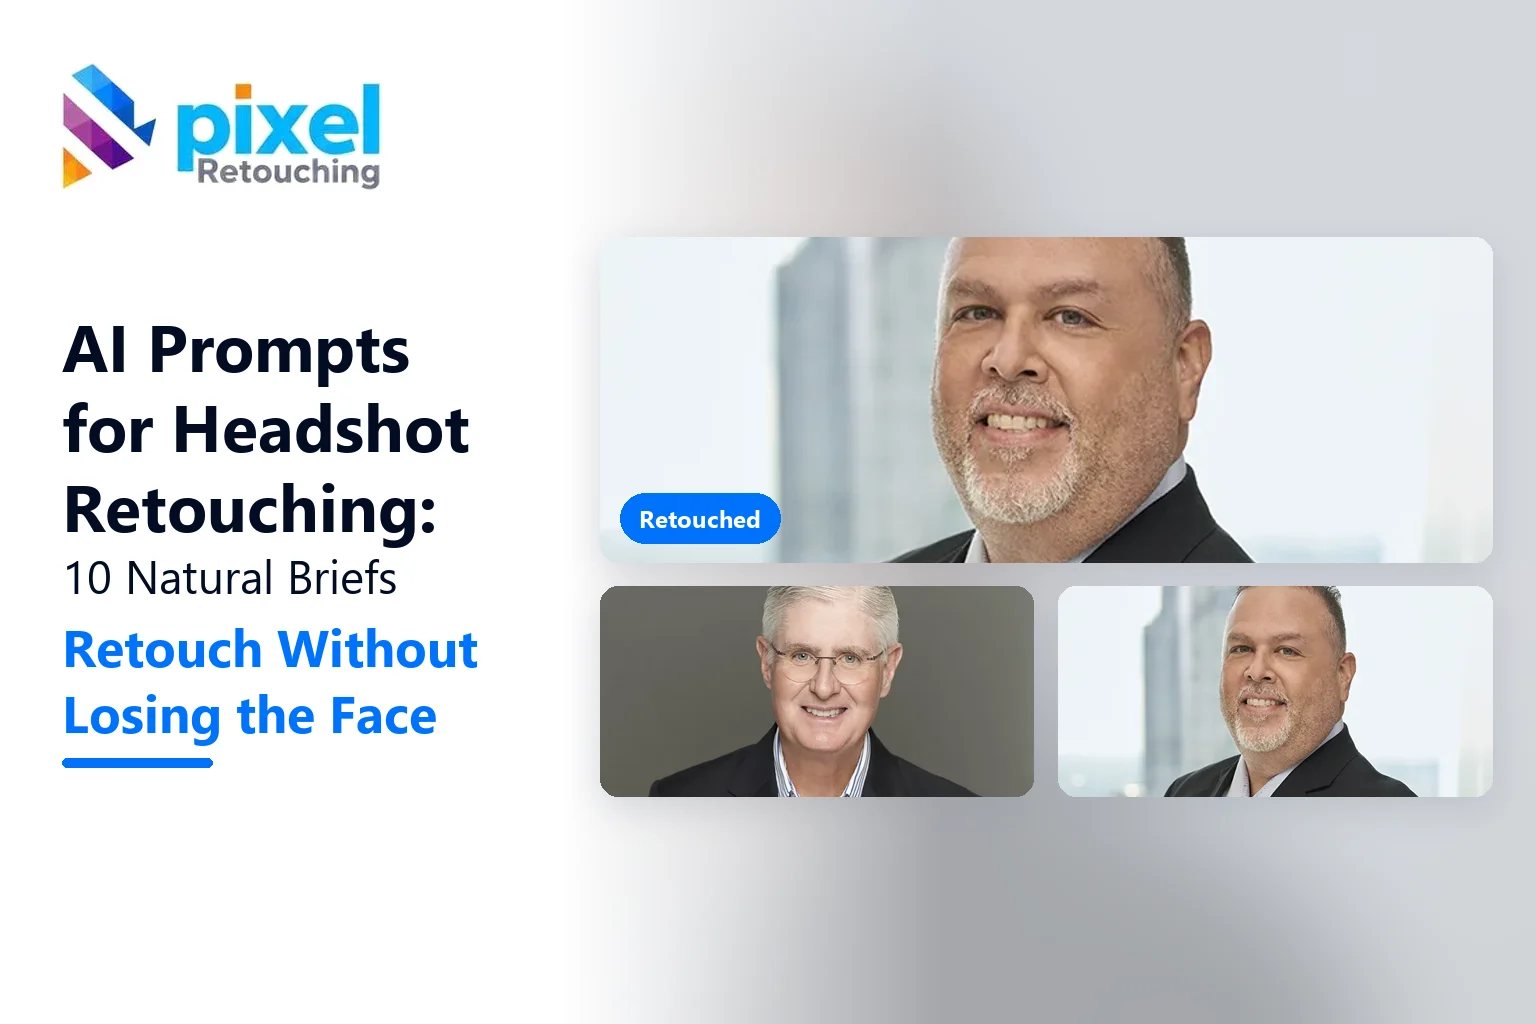
A headshot is a first impression with a person’s name on it. It sits on LinkedIn, a company website and a conference badge, and the person in it has to be recognisable when they walk into the room. That’s what makes headshot retouching harder than it looks: the edit has to be invisible.
The AI prompts for headshot retouching below are written the way a retoucher would brief the job: naming what to fix, what to keep and how far to go, instead of asking to “make me look professional”. Copy any of them into ChatGPT, Gemini or the AI editor in your photo tool, upload your own shot, and you will get much closer than a one-line request will.
Please read this before you scroll: the images in this article are not AI output.
Every before and after on this page is real client work, retouched by hand by the team at Pixel Retouching. We have used our own portfolio deliberately, because we would rather show you the standard these prompts are aiming at than show you a set of AI attempts and call them finished.
So treat the sliders as the target, not as a promise. A good prompt will get a straightforward headshot surprisingly close to what you see here. It will not get a difficult one all the way there, and the note under each prompt tells you where the gap usually opens up.
Three rules before you start
Keep the face the face. Bone structure, eye shape, nose, teeth and moles that define a person are not edits. If colleagues would not recognise the photo, it has failed.
Ask for less than you want. “Reduce” works better than “remove”, and “slightly” works better than nothing. Models overdo skin work by default.
Check at 100%, then at thumbnail. At 100% you see plastic skin and lost texture. At thumbnail size, the size people actually see, you see whether the person still looks like themselves.
1. A natural corporate retouch
 n
n Beforen Aftern
n n
n
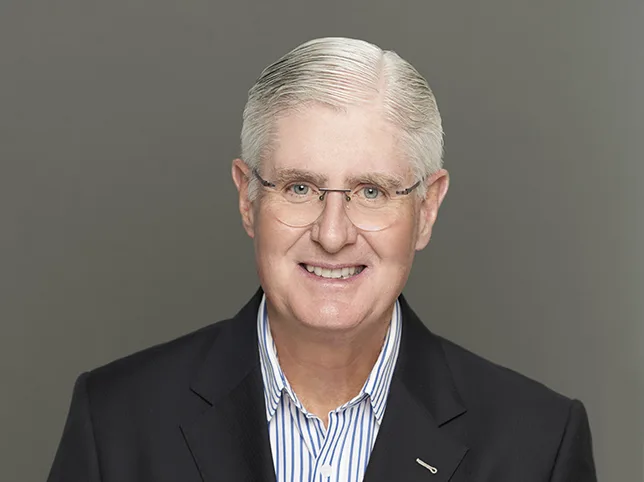
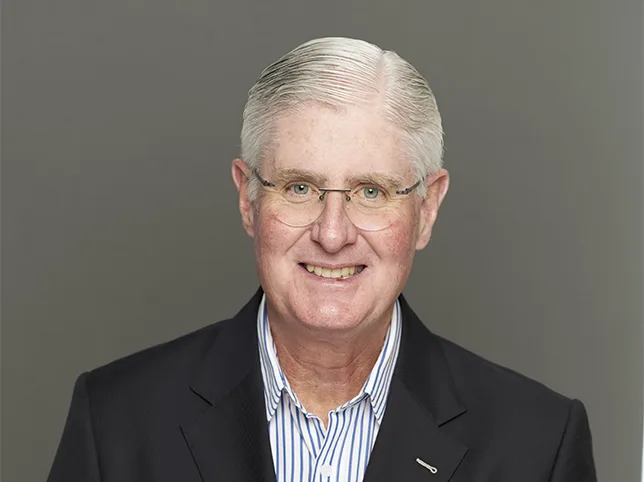
Corporate headshot retouching. Cleaner, but clearly the same person.
n
Retouch this corporate headshot naturally. Remove temporary blemishes and stray hairs. Reduce redness and shine on the forehead and nose. Keep the skin texture and pores visible. Do not change the shape of the face, eyes, nose, lips or jaw. Keep moles and freckles.
What to watch for: plastic skin. The first sign of an over-edit is skin with no pores, which looks fine at thumbnail and strange on a large screen.
2. An executive portrait with more polish
 n
n Beforen Aftern
n n
n
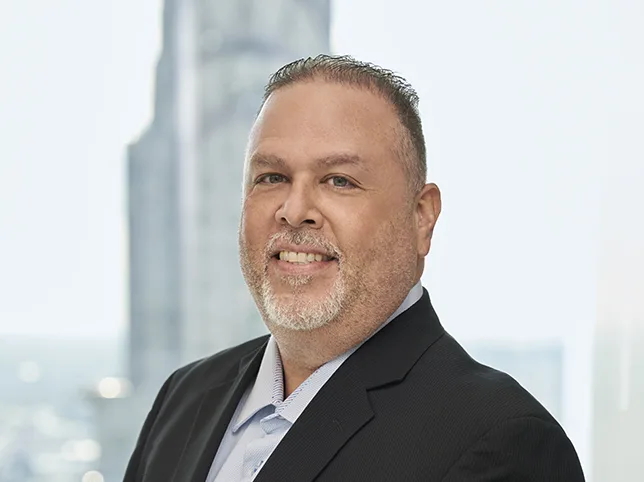
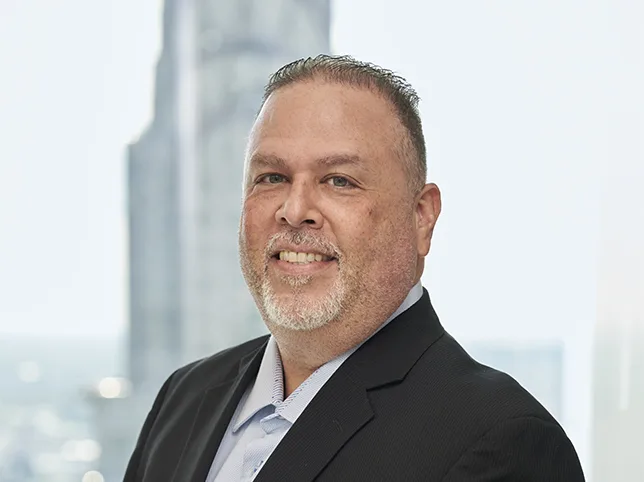
Executive headshot retouching. Polish on the light and colour, not the face.
n
Retouch this executive portrait. Even out skin tone, soften under-eye shadows by about half, and reduce fine lines slightly without removing them. Correct the colour so the skin looks natural under neutral light. Smooth creases in the jacket and tidy the collar. Keep the person’s age and character.
What to watch for: a younger stranger. Remove all lines and soften the jaw, and a 55-year-old looks 35 and unfamiliar. Reduce; don’t erase.
3. Background clean-up and replacement
 n
n Beforen Aftern
n n
n
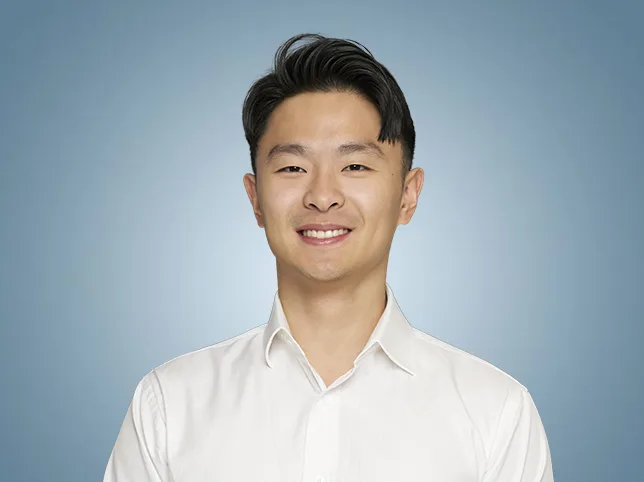
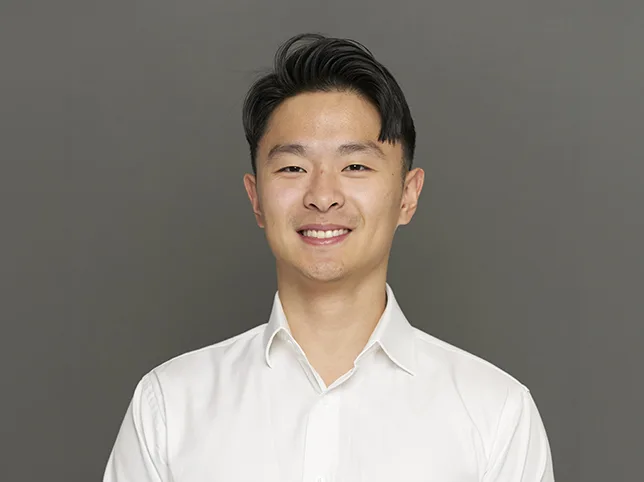
Headshot background editing. A clean backdrop, with hair edges intact.
n
Replace the background of this headshot with a smooth, even light grey studio background with a soft gradient. Keep every strand of hair at the edges, including flyaways, with no halo. Keep the lighting on the face unchanged.
What to watch for: helmet hair. AI cut-outs often trim hair into a neat shape, so the person looks like they’re wearing a wig.
4. Matching a team set
 n
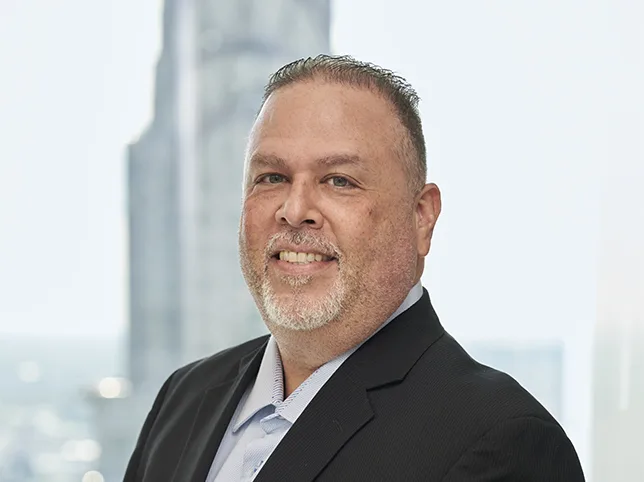
n Beforen Aftern
n n
n
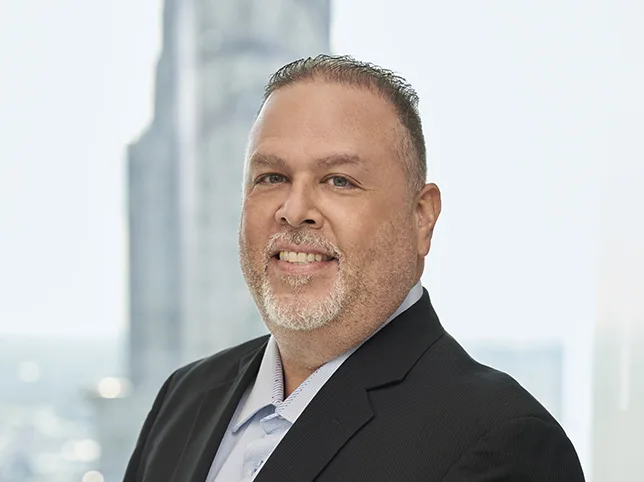
Team headshot editing. Consistent background, crop and colour across the set.
n
Edit this headshot to match the reference image I have uploaded from the same team: same background colour and gradient, same crop (top of head to mid-chest, eyes on the upper third line), same brightness and colour temperature. Do not change the person’s features.
What to watch for: different skin colour across the team. Matching backgrounds is easy. Matching skin tones naturally, for every skin colour, is the hard part.
5. Glasses glare
Remove the reflection of the light source from the lenses of these glasses so the eyes are clearly visible. Keep the lenses looking like glass, with a faint natural reflection. Do not change the eyes, frames or the face.
What to watch for: new eyes. Under a heavy reflection, models have to guess the eyes, and they often guess wrong. Check that the eye colour and direction match.
6. Teeth
Whiten the teeth slightly so they look clean and natural, about one or two shades. Keep their shape, size, spacing and natural variation in colour. Do not make them pure white.
What to watch for: new teeth. Models redraw teeth into a perfect row. The person’s real smile is part of who they are.
7. Stray hairs and flyaways
Remove stray hairs crossing the face and forehead and the most distracting flyaways around the head. Keep the hairline, parting and natural volume of the hair. Do not change the hairstyle.
What to watch for: a new hairline. Removing too much at the edges can move a hairline or thin out the hair.
8. Clothing creases
Smooth the creases in this shirt and jacket at the shoulders and collar. Keep the fabric texture, the pattern and the natural folds at the arms. Straighten the collar and tie.
What to watch for: a new pattern. On striped or checked fabric, models may straighten the pattern into something that doesn’t line up.
9. Colour correction for skin
Correct the colour of this photo so the skin looks natural under neutral light. Remove the green cast from the office lighting. Keep the person’s real skin tone; do not make it lighter, darker, warmer or cooler than it is.
What to watch for: a changed skin tone. Some models lighten or warm skin by default. This is the most important thing to check on every headshot.
10. An outdoor headshot
Retouch this outdoor headshot. Soften harsh shadows under the eyes and nose from the sun by about half. Blur the background slightly more so the person stands out. Remove small blemishes. Keep the natural light and skin texture.
What to watch for: studio-looking outdoor shots. Fill all the shadows and the photo looks lit by a flat light that wasn’t there.
Where these prompts stop working
Everything above assumes a sharp, well-lit headshot. On a good photo needing light clean-up, a prompt saves real time.
Headshots are also where AI is most likely to go wrong, and it is worth being specific about where:
Identity. Small changes to eyes, nose or jaw make a person look like a cousin of themselves.
Skin texture. Real skin has pores, fine hair and variation. Models remove it all, by default.
Skin tone. Correcting colour without changing someone’s real skin tone needs care, especially across a diverse team.
Consistency. A team page needs 40 people to look like they were shot on the same day.
Used honestly, that is not an argument against prompting. It is the case for knowing what to prompt. Our headshot retouching service keeps skin texture and identity intact, from $2 per image. For full portraits, see our photo retouching services.
Frequently asked questions
Are the headshots in this article AI generated?
No. Every before and after on this page is real client work, retouched by hand by the Pixel Retouching team. They show the standard the prompts are aiming at, not results produced by the prompts.
Can AI retouch a headshot naturally?
Yes, with a careful prompt. Ask the model to reduce, not remove, and to keep skin texture, moles and face shape. Always compare the result with the original to check the person still looks like themselves.
Why does AI make skin look plastic?
AI models smooth skin by default because smooth skin looks clean at small sizes. Asking to keep pores and texture visible, and limiting the edit to blemishes and redness, helps prevent the plastic look.
Can AI change my headshot background?
Yes. Ask for a specific colour and gradient, and to keep every hair at the edges. Check closely around the hair, where AI cut-outs often leave halos or trim flyaways.
Is it OK to use an AI-edited headshot on LinkedIn?
Yes, as long as it still looks like you. Light retouching is normal for professional headshots. A heavily altered photo can backfire when you meet people in person or on video calls.
See it on your own headshots
If you would rather judge this on your own photographs than on ours, send three images through the free trial. A retoucher edits them by hand and sends them back within 24 hours. No card, and you keep the files either way, including any you have already run through a prompt, which is the fastest way to see the difference side by side.
More prompt libraries
- 9 AI Prompts for Shopify and Etsy Product Photos
- 14 AI Prompts for Product Shadows and Reflections
- 13 AI Prompts for Product Colour Accuracy and Colourways
- 12 AI Prompts for Amazon Main Images (Copy & Paste)
- 11 AI Prompts for Background Removal and White Backgrounds
- 18 AI Prompts for Jewellery Product Photos (Copy & Paste)
- 15 AI Prompts for Ghost Mannequin Photos (Copy & Paste)
- 10 Best AI Prompts for Clothing Product Photos (Copy & Paste)