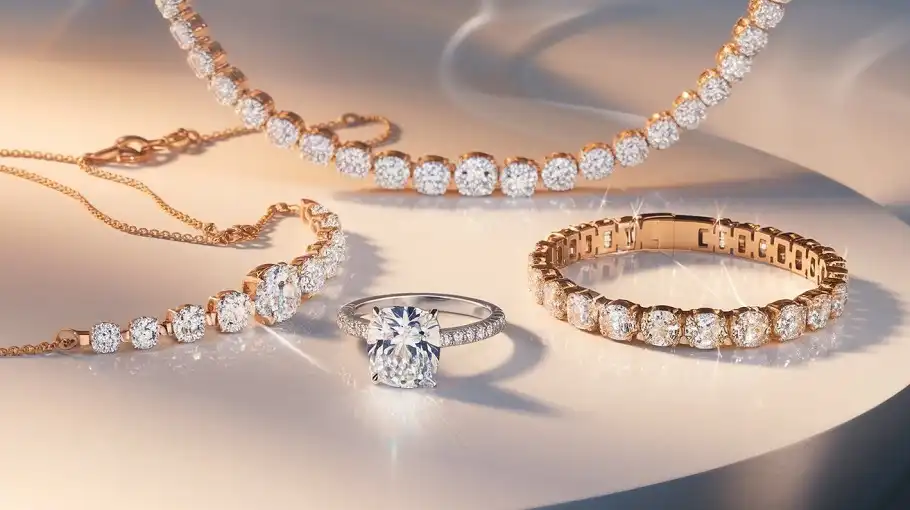

Jewellery is the hardest product category to photograph and the hardest to edit. Everything that sells the piece — the fire in a stone, the polish on a band, the difference between white gold and silver — lives in reflections a few pixels wide. Get those wrong and the piece looks cheap; invent them and you have misrepresented what the customer is buying.
That makes jewellery a useful test of what AI image tools can and cannot do. The prompts below are written the way a retoucher would brief the job, naming the metal, the stone and the surface behaviour instead of asking for “a beautiful ring photo”. Copy any of them into ChatGPT, Gemini, Midjourney or the AI editor inside your product-photo tool, upload your own shot, and you will get closer than a one-line request ever will.
Please read this before you scroll: the images in this article are not AI output.
Every before and after on this page is real client work, retouched by hand by the team at Pixel Retouching. We have used our own portfolio deliberately, because we would rather show you the standard these prompts are aiming at than show you a set of AI attempts and call them finished.
So treat the sliders as the target, not as a promise. A good prompt will get a straightforward piece surprisingly close to what you see here. It will not get a difficult one all the way there — and the note under each prompt tells you exactly where the gap usually opens up.
Three rules before you start
Upload your piece; do not ask for one. These are editing prompts. A model asked to generate a solitaire ring will produce a lovely ring that does not exist, with a stone count and a setting that are not yours. Always start from your own photograph.
Name the metal and the stone. “Gold” covers yellow, rose and champagne. “A clear stone” covers diamond, white sapphire, moissanite and cubic zirconia, and they do not behave the same in light. The more precisely you name it, the less the model invents.
Check the stones at 100% every single time. This is the one habit that matters. Facet patterns are where generated jewellery falls apart, and it is invisible at thumbnail size — which is exactly the size you will be looking at when you approve it.
1. Solitaire engagement ring on pure white
Before
After
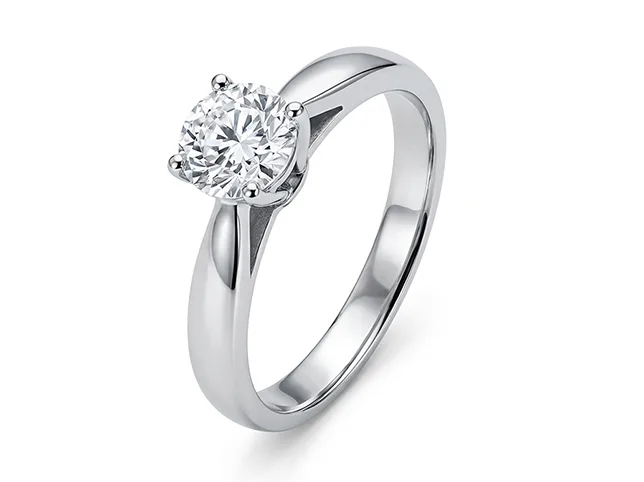
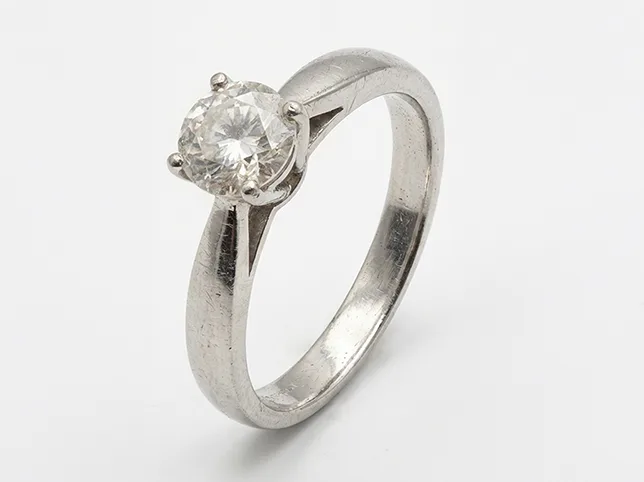
Solitaire engagement ring retouching. Drag to compare.
Retouch this solitaire engagement ring for an eCommerce listing. Remove all dust, fibres and fingerprints from the metal and the stone. Even out the band so the polish reads as continuous, without flattening the highlights. Keep the stone’s facet pattern exactly as photographed — do not redraw, add or remove facets. Pure white background, RGB 255, 255, 255, with a clean edge around the ring. Soft even studio light, no colour cast on the metal.
What to watch for: the facets. A solitaire has a specific cut with a specific number of facets, and a model that cannot resolve them will draw a generic brilliant. Zoom to 100% on the table and crown before you publish.
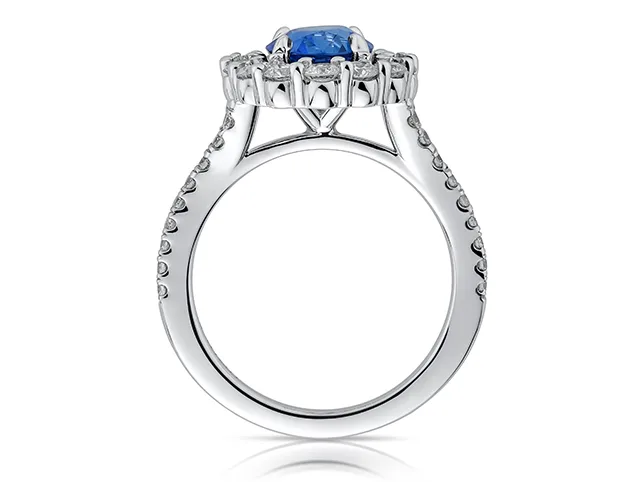
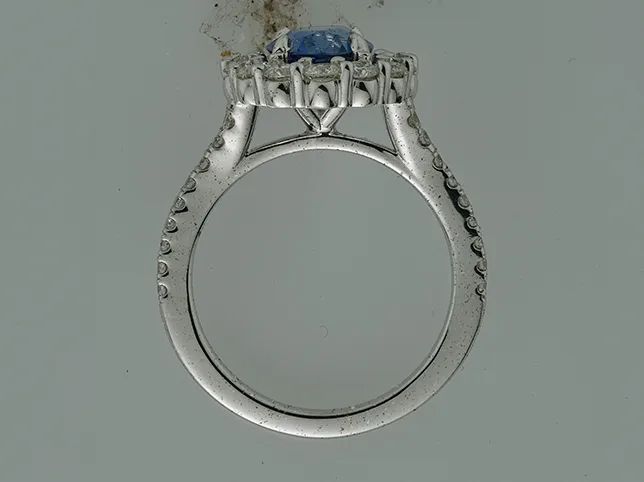
2. Halo setting, where the small stones matter
Before
After
Sapphire halo ring retouching. Every stone in the halo has to stay countable.
Clean up this halo ring for a product listing. Keep every stone in the halo separate and countable, with visible metal between them — do not merge them into a continuous band of sparkle. Preserve the centre stone’s colour and saturation exactly as photographed. Remove dust and fibres only. Pure white background, soft directional light from the upper left, no blown highlights on the metal.
What to watch for: the stone count. Merged or invented halo stones are the most common failure in generated jewellery, and on a listing that carries a stone count in the description it is a factual error, not a cosmetic one.
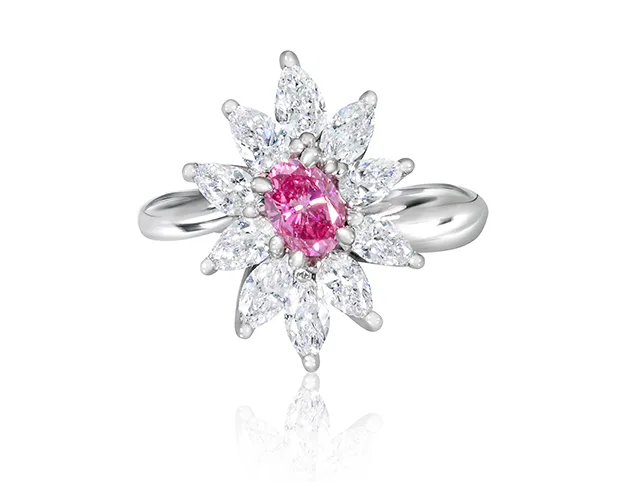
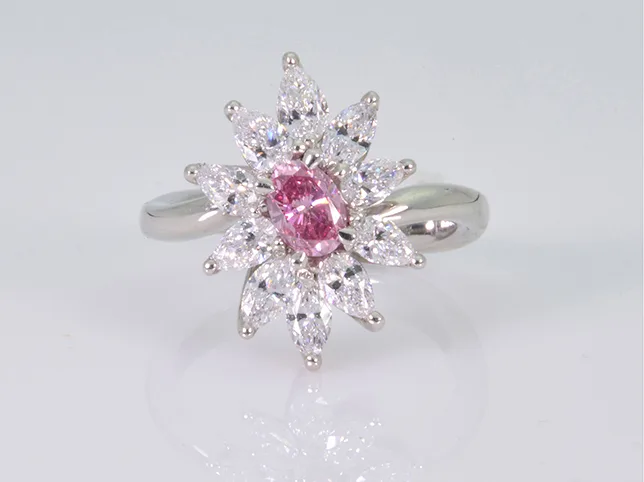
3. Coloured stones, where saturation is the product
Before
After
Pink sapphire cluster ring retouching. The colour is the thing being sold.
Retouch this pink sapphire cluster ring. Hold the stone colour exactly as photographed — do not increase saturation, shift the hue towards magenta, or brighten the stones. Clean dust and fibres from the metal and the setting. Keep the individual stones distinct with visible claws between them. Pure white background, soft even light, neutral white balance.
What to watch for: saturation creep. Models ‘improve’ coloured stones by pushing saturation, and a sapphire that arrives duller than the listing photo is a return and a dispute.
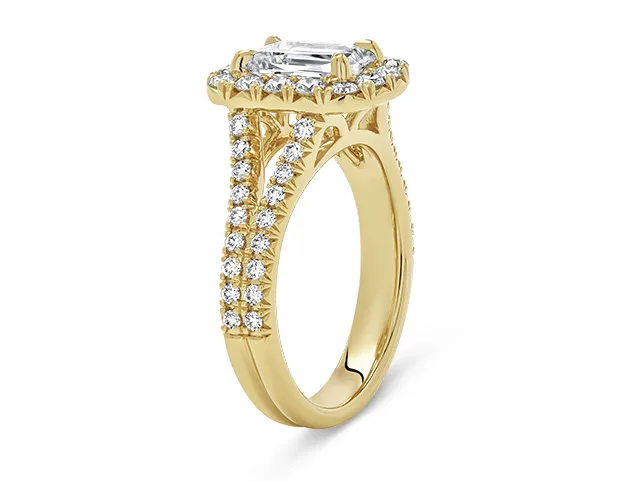
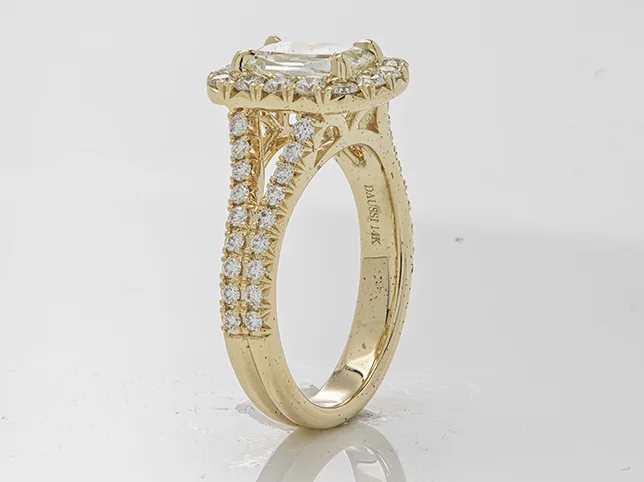
4. Pavé work at close range
Before
After
Yellow gold pavé ring retouching.
Clean up this yellow gold pavé ring. Keep every pavé stone individually visible with the bead setting and metal walls intact between them. Preserve the warm yellow gold tone exactly — do not shift it towards brass, copper or a cooler gold. Remove dust and polishing marks. Pure white background, soft broad light, no hard specular hotspots.
What to watch for: the gold tone. Yellow gold, rose gold and brass sit close together in colour, and a model correcting white balance will happily move one into another.
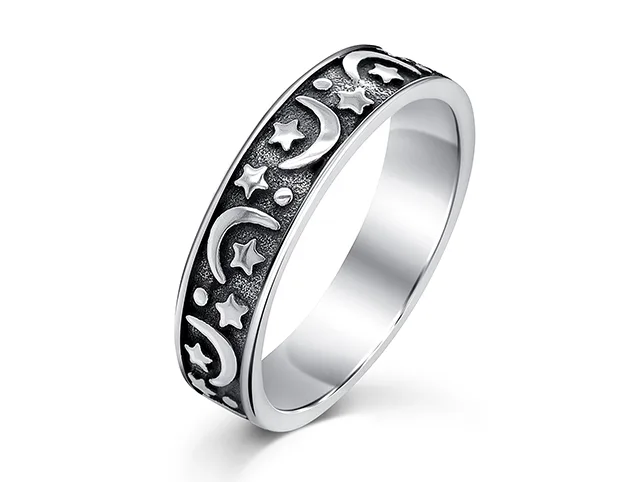
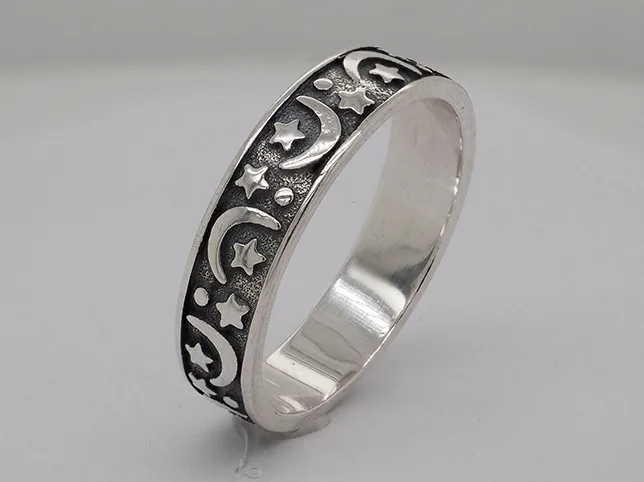
5. Filigree and open metalwork
Before
After
Filigree band retouching. Openwork is where a cut-out becomes real retouching.
Retouch this filigree band. Keep the openwork pattern exactly as it is, including every gap where the background shows through the metal. Do not simplify, regularise or redraw the pattern. Clean dust from inside the openings without filling them. Pure white background showing through the gaps at the same white as the surrounding background. Soft even light.
What to watch for: invented pattern. When a model cannot resolve fine openwork it substitutes a plausible pattern of its own. Compare a section against your original at full size.
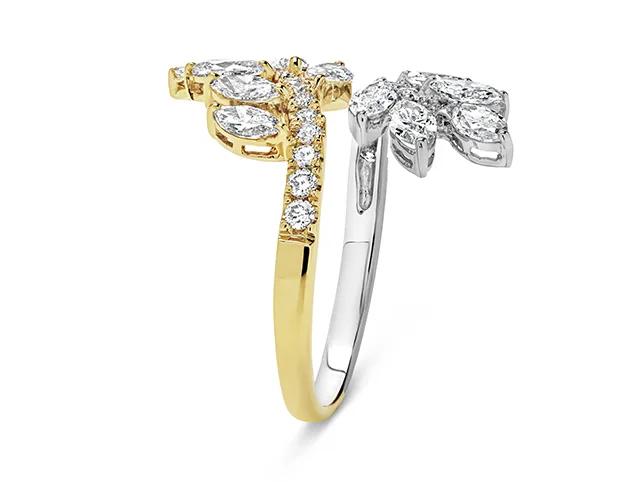
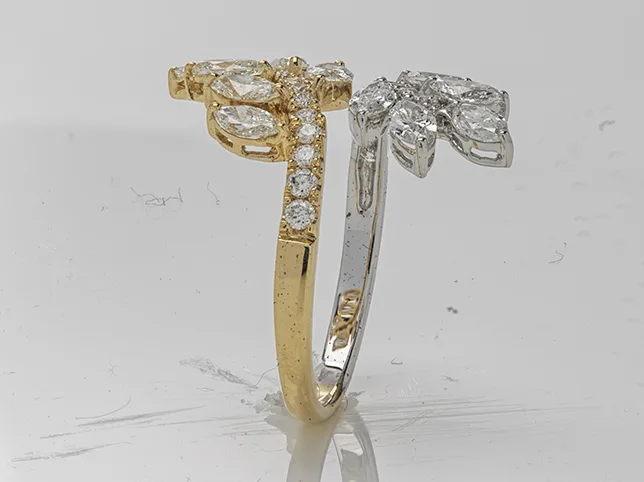
6. Two-tone metal in one piece
Before
After
Two-tone bow ring retouching. Two metals, one white balance.
Retouch this two-tone ring. Keep both metals clearly distinct from each other and true to the photograph — the warm metal must stay warm and the white metal must stay neutral, with no colour bleeding between them where they meet. Remove dust and fingerprints. Pure white background, soft even studio light, neutral overall white balance.
What to watch for: colour bleed at the join. A single global white balance correction tends to pull both metals towards each other, which is the one thing a two-tone piece cannot survive.
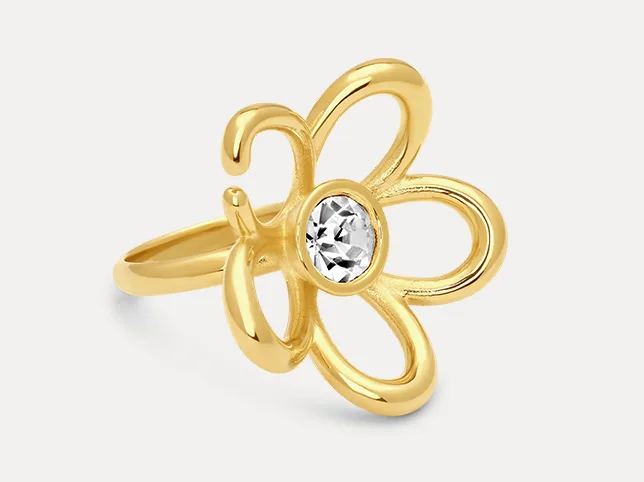
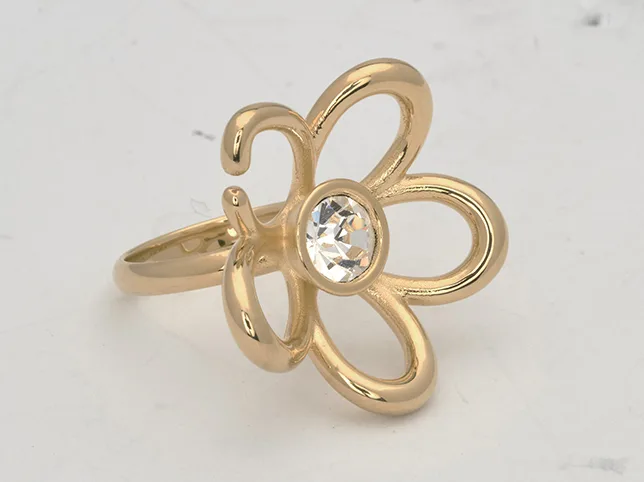
7. Correcting colour without changing the piece
Before
After
Flower ring colour correction.
Colour correct this ring photograph only. Remove the colour cast from the lighting so the metal reads as its true colour and the white background is neutral. Do not change the shape, the stones, the setting or the polish. Do not increase contrast or clarity. The correction should be limited to white balance and exposure.
What to watch for: scope creep. Asked to correct colour, models frequently also sharpen, brighten and reshape. The words ‘only’ and ‘do not’ in that prompt are doing the real work.
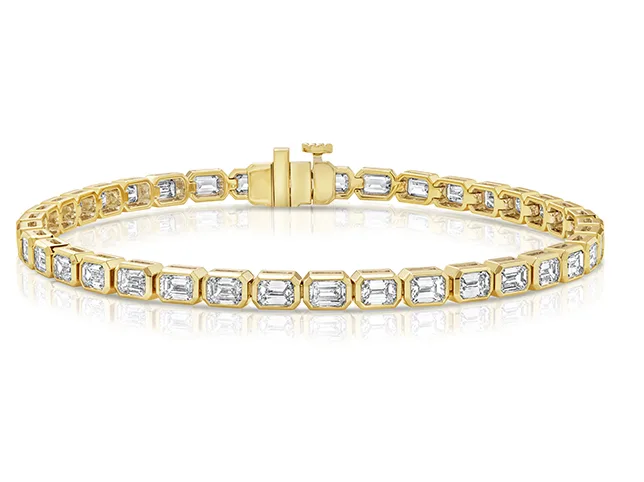
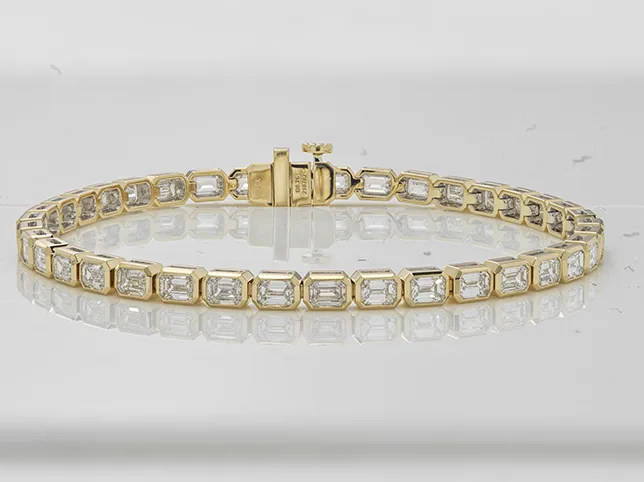
8. A tennis bracelet, where every link repeats
Before
After
Diamond tennis bracelet retouching. Repetition is the trap.
Retouch this diamond tennis bracelet. Keep the number of links and stones exactly as photographed. Every stone should hold its own facet pattern and its own highlight rather than becoming a repeating copy of its neighbour. Clean dust and fibres from between the links. Pure white background, soft even light along the full length of the bracelet.
What to watch for: copy-paste stones. Repeating structures invite models to tile one stone along the whole bracelet, which looks convincing at a glance and wrong the moment anyone compares two links.
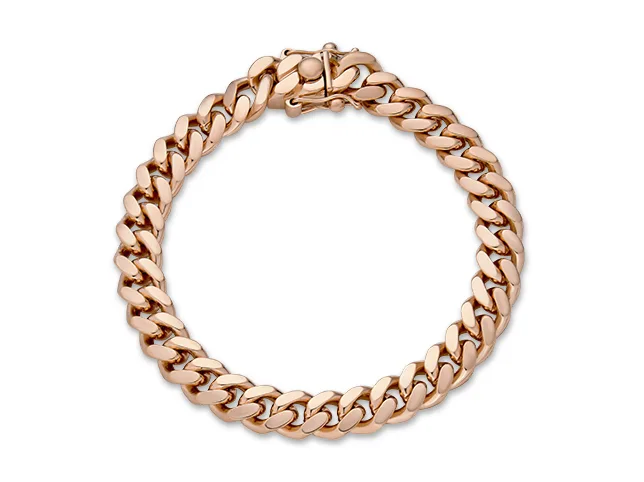
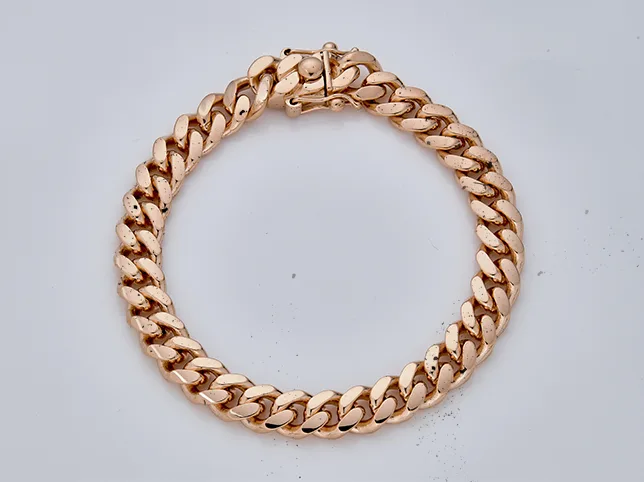
9. Heavy polished metal
Before
After
Cuban link bracelet retouching. Polish is highlight shape, not brightness.
Retouch this heavy polished bracelet. Keep the specular highlights on each link the shape and position they were photographed — polish reads through highlight shape, not through overall brightness. Remove dust, fingerprints and polishing cloth marks. Do not smooth the metal into a flat gradient. Pure white background, soft broad light source, no clipped white highlights.
What to watch for: flattened highlights. The usual failure is metal smoothed into a soft gradient, which turns a solid gold bracelet into something that looks plated.
10. Macro cut-out on a small piece
Before
After
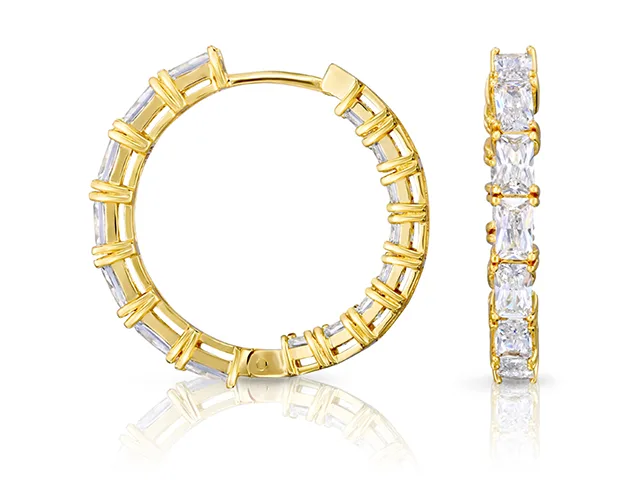
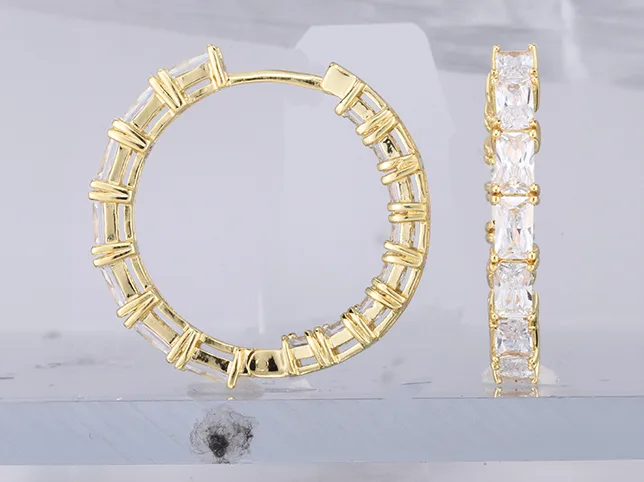
Hoop earring cut out at macro. At this scale the edge is the whole job.
Cut this earring out onto a pure white background. Follow the true edge of the metal precisely, including the inside of the hoop, and keep the post and the fitting complete. Do not leave a halo, a dark rim or a soft fringe anywhere along the edge. Keep the piece at its photographed size and position in frame. Pure white background, RGB 255, 255, 255.
What to watch for: the inside of the hoop. Enclosed background areas are missed far more often than outer edges, and they show up as a grey patch inside a piece that should be see-through.
11. A chain, where thin repeated links break down
Before
After
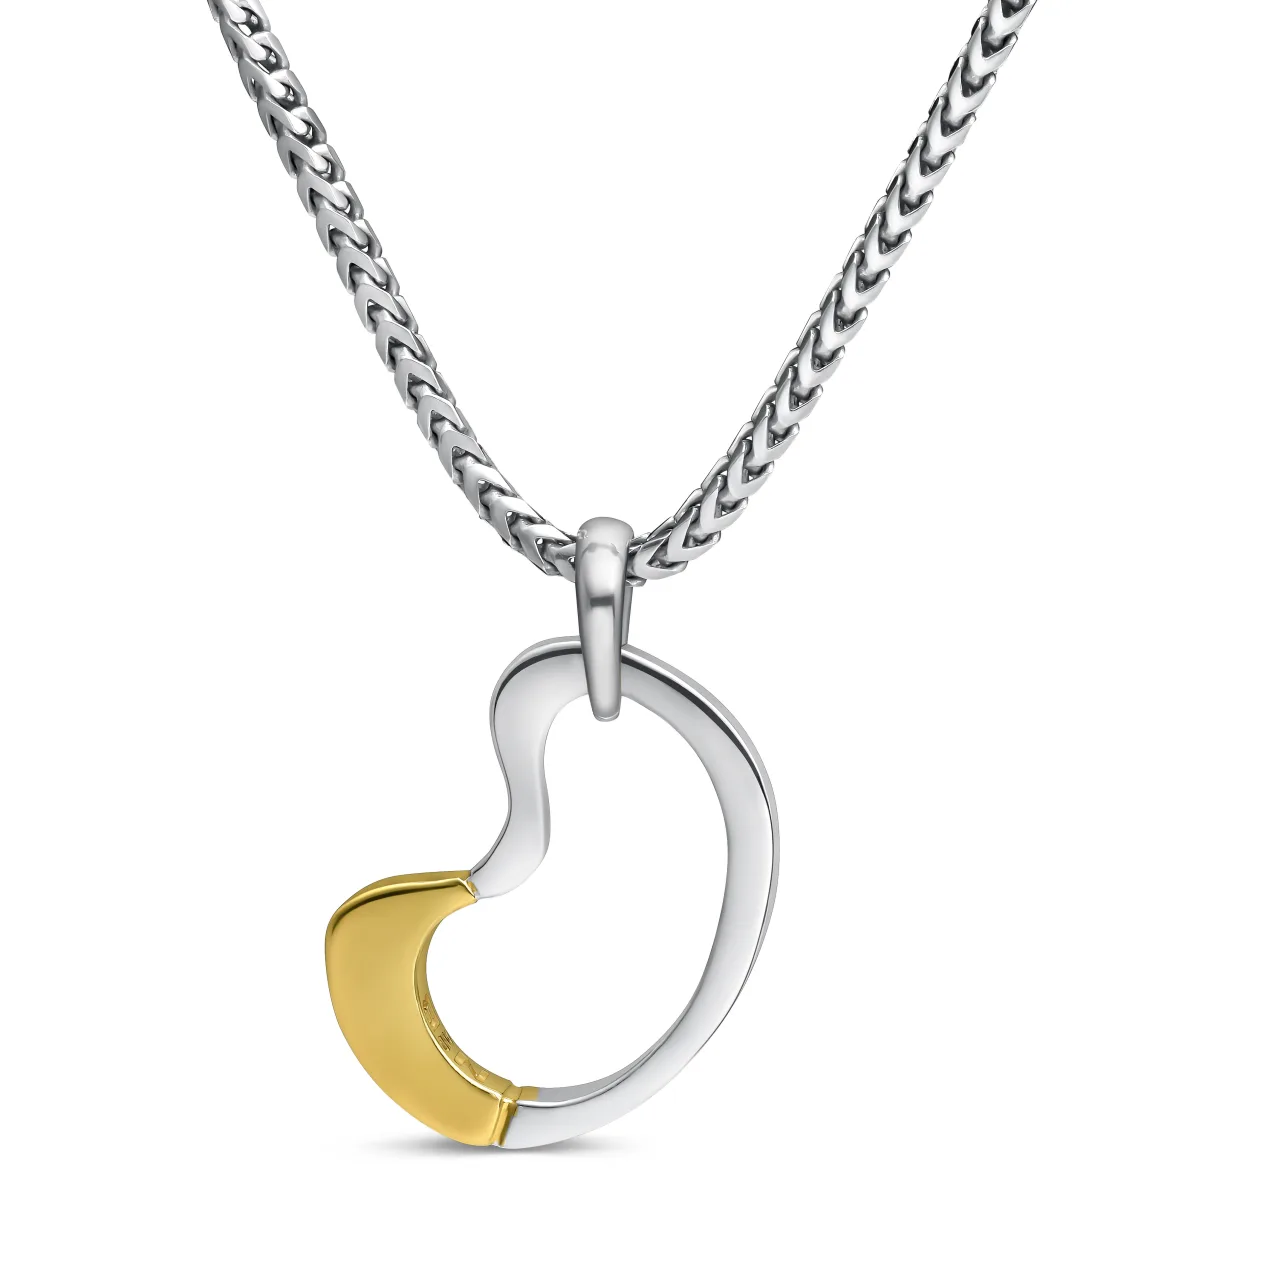
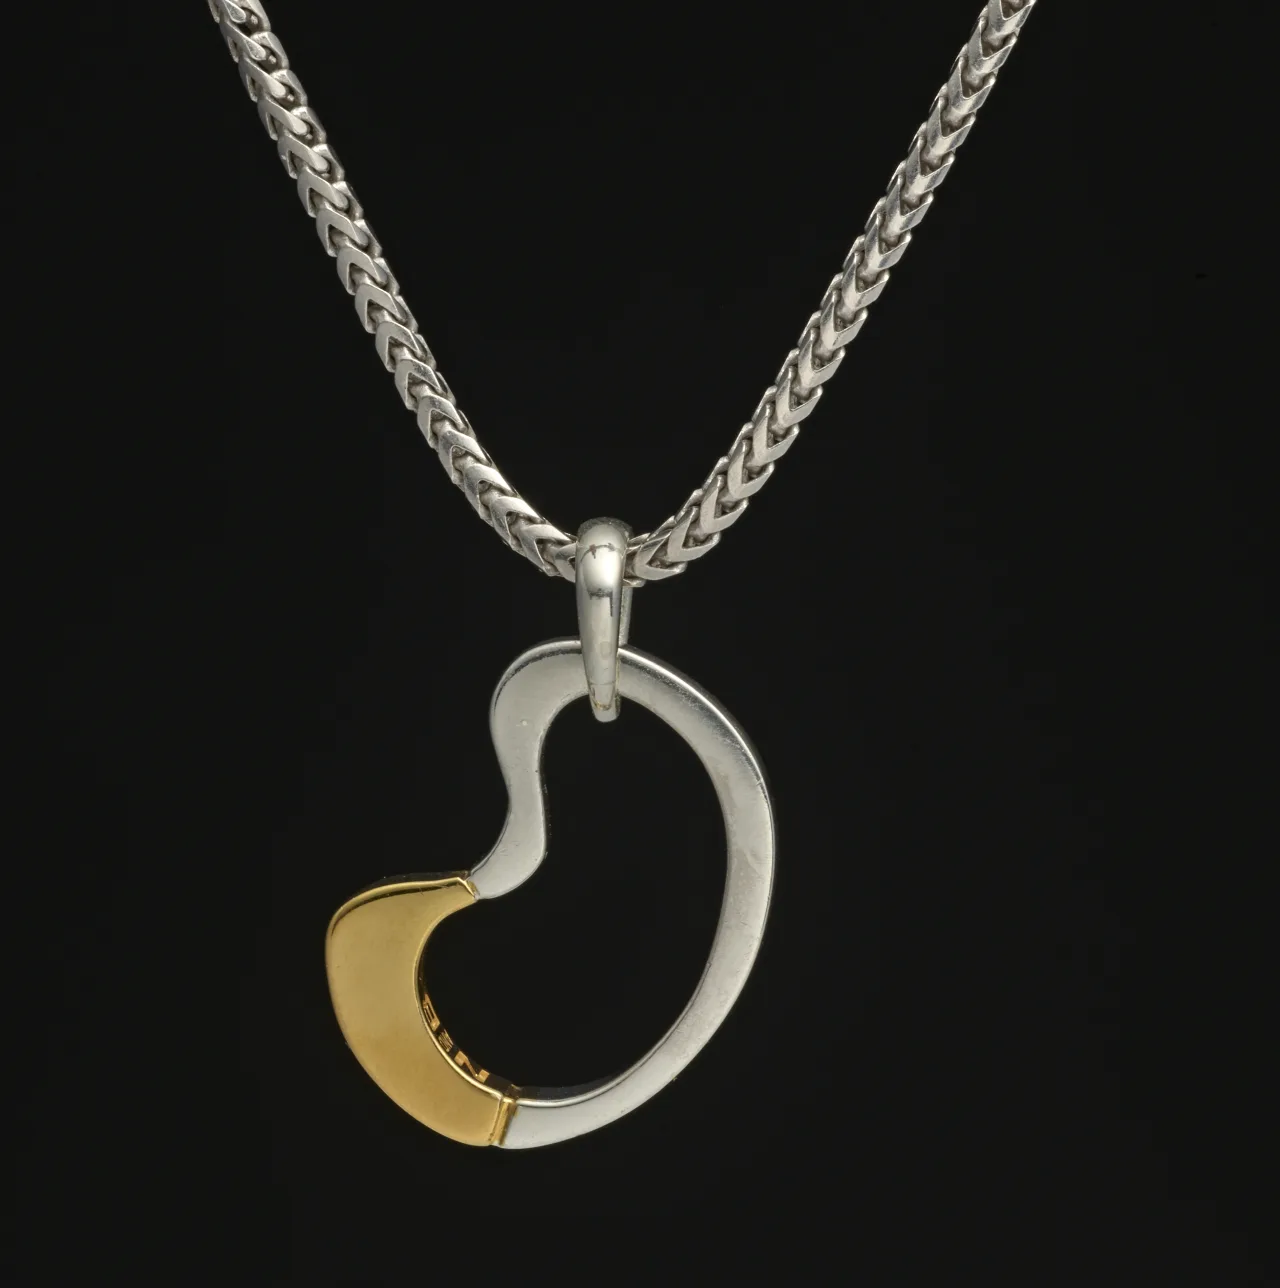
Moon pendant and chain retouching. Chains are the thinnest thing on this page.
Retouch this pendant and chain. Keep the chain continuous and unbroken along its full length, with the individual links still readable rather than blurred into a line. Preserve the pendant’s detail and the metal colour. Remove dust and stray fibres from the background and from the chain itself. Pure white background, soft even light.
What to watch for: broken or fused chains. A chain a few pixels wide is below the resolution a model reliably reconstructs, so links get dropped, doubled or melted together. Follow the whole chain, not just the part near the pendant.
12. A watch dial, where text must survive
Before
After
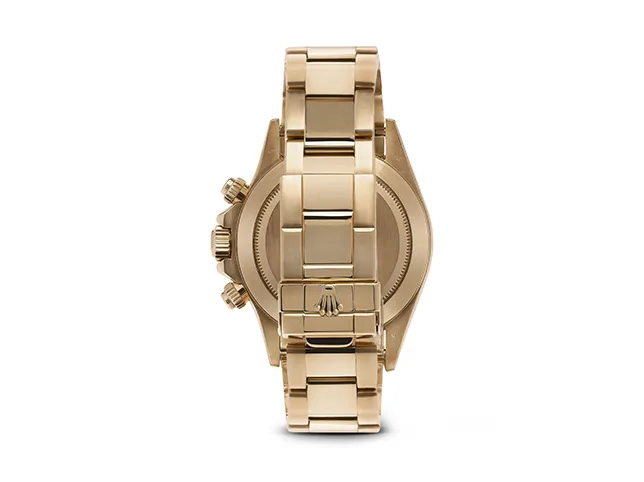
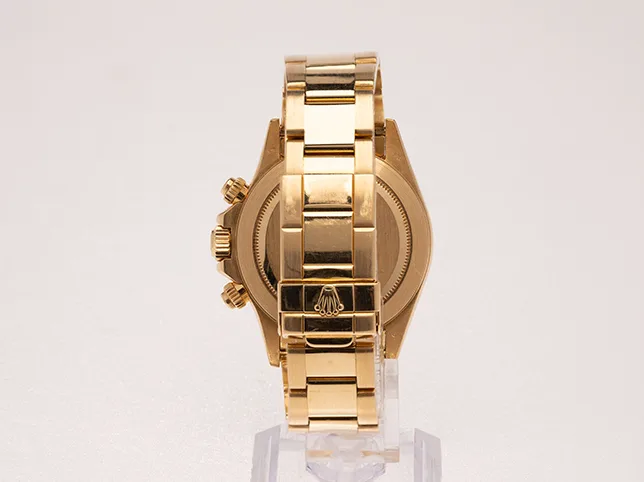
Gold watch retouching. The dial is text, and text is where models improvise.
Retouch this watch for a product listing. Keep every marking on the dial exactly as photographed — the brand name, the indices, the sub-dials and any date window must not be altered, redrawn or repositioned. Clean dust and fingerprints from the case and bracelet. Preserve the metal tone. Pure white background, soft even light with no reflection of the studio in the crystal.
What to watch for: the branding. This is the one to be careful with commercially: a model will cheerfully redraw a brand name into something almost right, and an almost-right logo on a listing is a trademark problem as well as a photography one.
13. Glass, crystal and reflective faces
Before
After
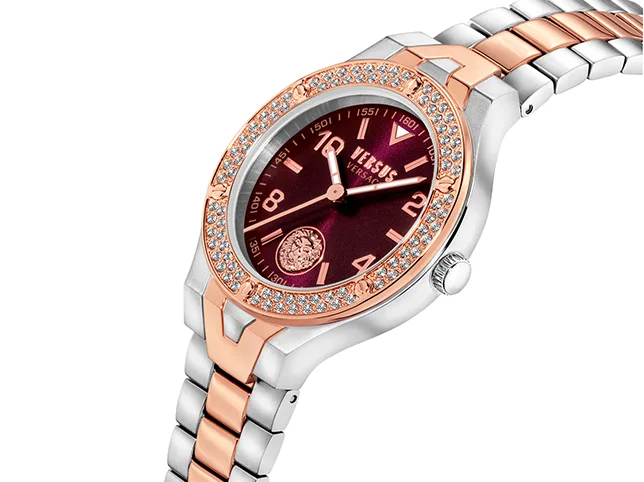
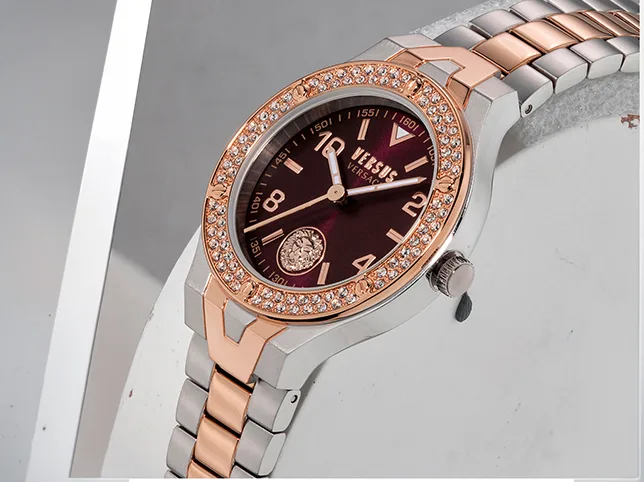
Crystal-bezel watch retouching. Reflections have to be managed, not deleted.
Retouch this watch with a crystal bezel. Reduce distracting reflections on the crystal without removing them entirely — the surface must still read as glass rather than as matte plastic. Keep the dial fully legible through the crystal. Remove dust and fingerprints from the case. Pure white background, soft even light, no visible reflection of a light source or a room.
What to watch for: over-cleaning. Remove every reflection and glass stops looking like glass. The give-away is a bezel that reads as a flat printed circle.
14. Dust and fibre clean-up at macro
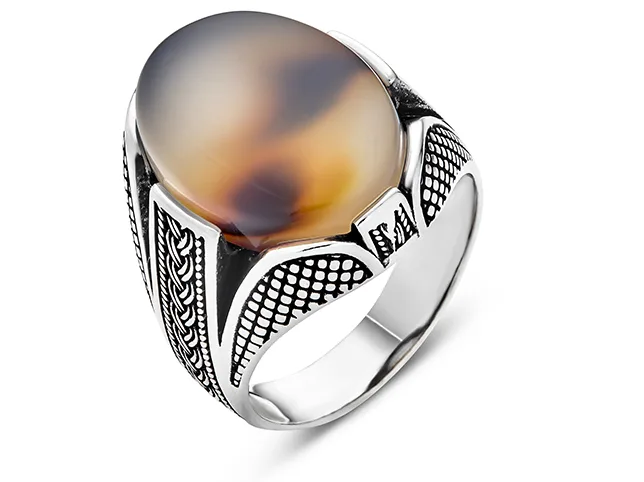
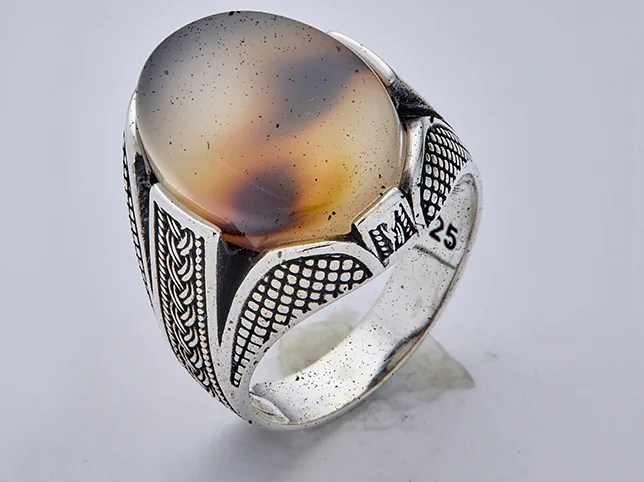
Before
After
Dust removal at macro. Every piece needs this and no prompt does it completely.
Remove dust, lint, fibres and fingerprints from this jewellery photograph. Clean the background and the piece itself, including inside the setting and between the stones. Do not soften, blur or smooth the metal or the stones while cleaning — the surface texture and the facet edges must stay exactly as sharp as they are now. Keep the background pure white.
What to watch for: softening. The fastest way to remove dust is to blur, and models take it. If the piece comes back cleaner and slightly less sharp, the dust is gone and so is the detail you were selling.
15. Polishing metal without inventing it
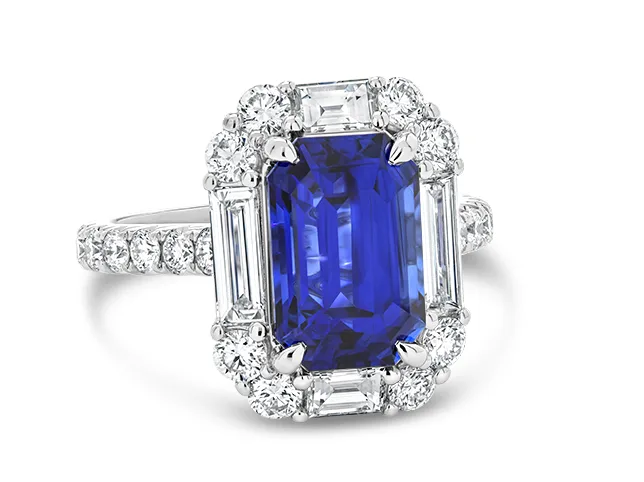
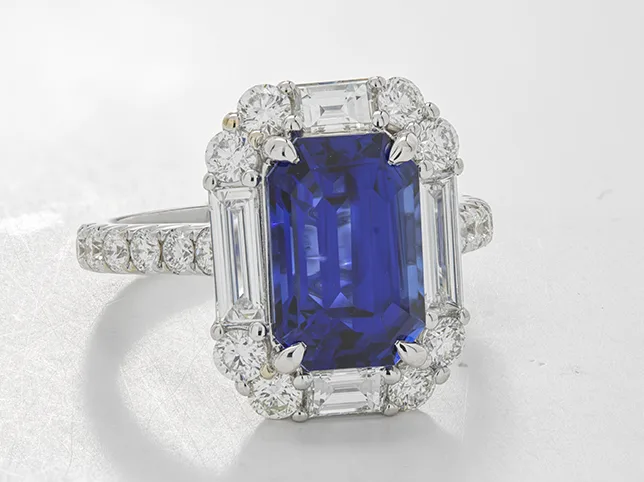
Before
After
Ring metal polishing. Removing a scratch is not the same as rebuilding a surface.
Remove surface scratches and polishing marks from the metal on this ring. Rebuild the affected areas to match the surrounding metal’s tone and highlight direction, so the repair is invisible. Do not alter the shape of the band, the setting or the stones, and do not change the overall brightness of the piece. Pure white background, soft even studio light.
What to watch for: repairs that read as patches. A rebuilt area with a slightly different highlight direction is more obvious than the scratch it replaced. Tilt your head and look for a shape that does not follow the band.
16. Correcting a gemstone that photographed wrong
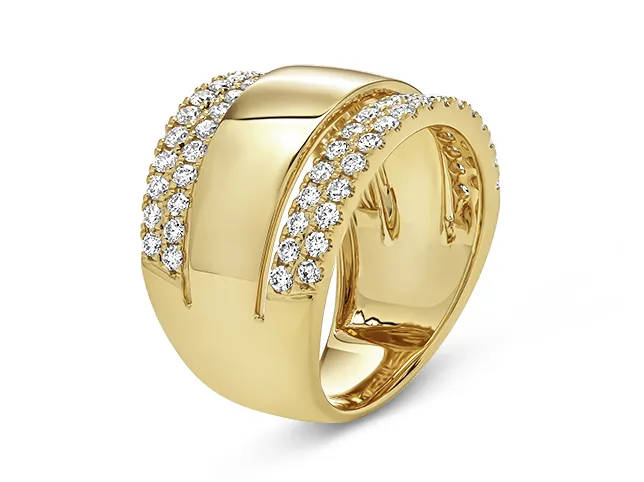
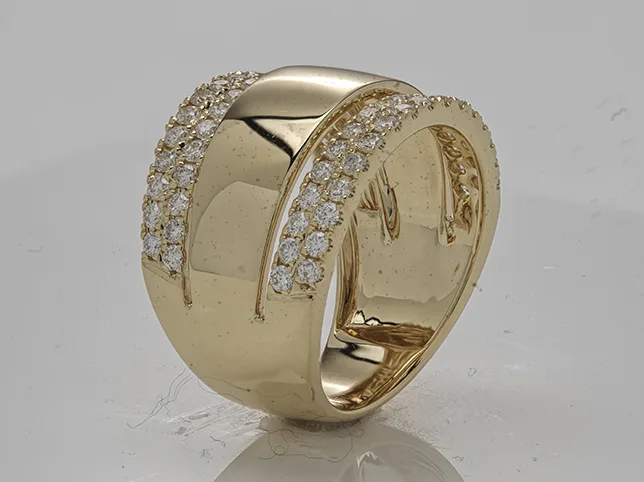
Before
After
Gemstone colour correction.
Correct the colour of the stone in this photograph so it matches the real gem. Remove the lighting cast without changing the stone’s saturation or its depth of colour. Keep the internal reflections, the facet highlights and any visible inclusion exactly as photographed. Do not touch the metal colour while correcting the stone. Pure white background, neutral white balance.
What to watch for: the metal moving with the stone. A global correction shifts both. If the setting changed tone while you were fixing the gem, the correction was not local.
17. A watch, shot for a listing rather than a campaign
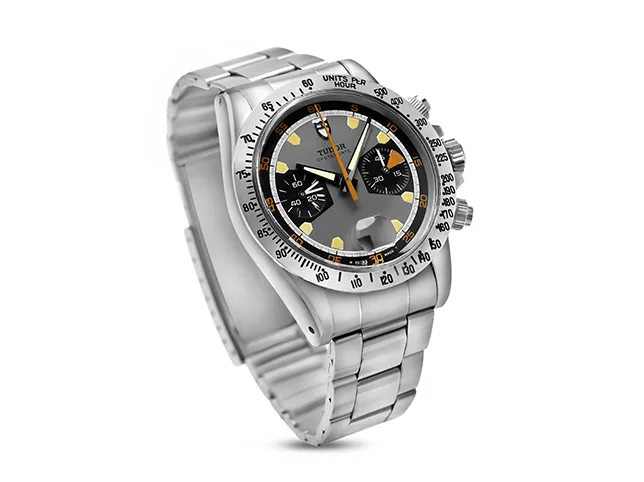
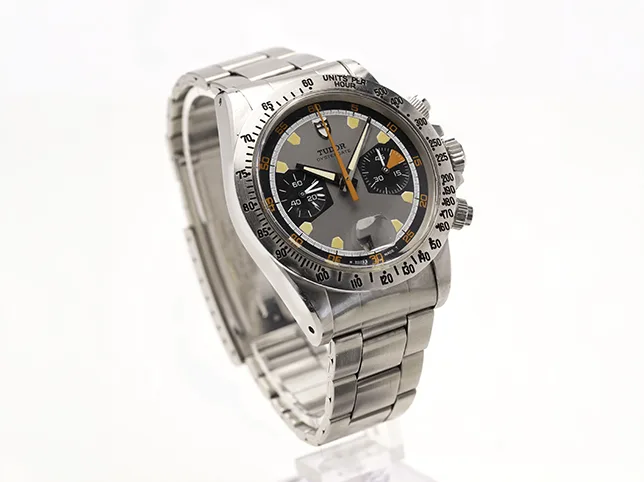
Before
After
Watch retouching.
Retouch this watch as a straightforward listing image. Clean fingerprints, dust and smears from the case, the bracelet and the crystal. Keep the dial completely legible and every marking on it unaltered. Preserve the difference in finish between brushed and polished surfaces rather than making the whole case uniform. Pure white background, soft even light.
What to watch for: brushed and polished merging. Most cases use both finishes, and a model cleaning the metal tends to render all of it the same, which flattens the piece.
18. General clean-up and polish, the everyday job
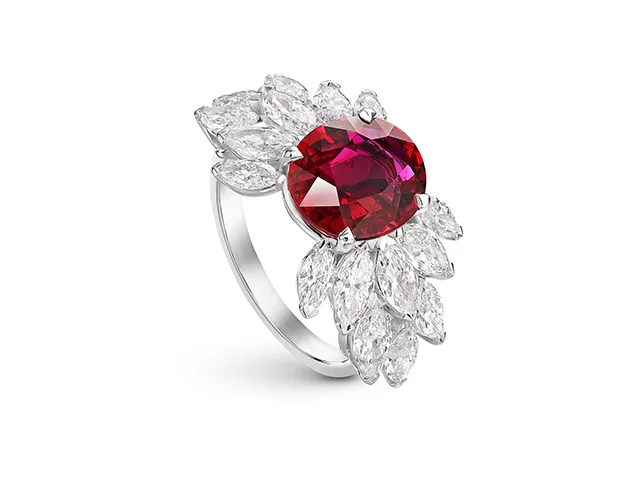
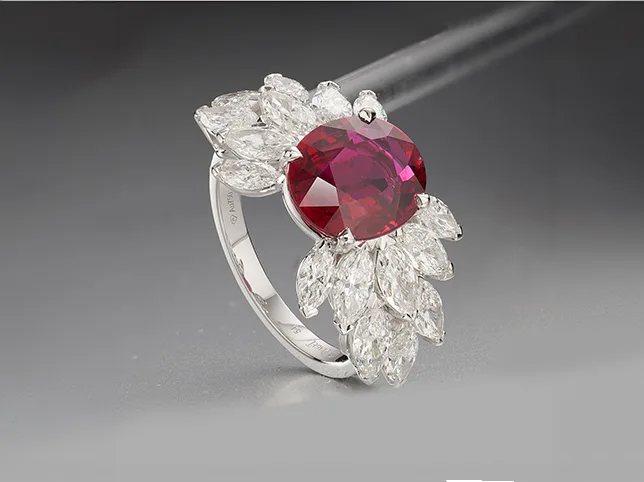
Before
After
Jewellery clean-up and polish.
Clean and polish this jewellery photograph for a listing. Remove dust, fibres, fingerprints and small surface marks. Even out the metal so it reads as well-polished, keeping the existing highlight positions rather than adding new ones. Do not alter the stones, the setting or the proportions. Do not sharpen. Pure white background, soft even studio light.
What to watch for: added highlights. Asked to make metal look polished, models invent extra specular hits that were never in the shot, and they usually contradict the light already on the piece.
Choosing between a reflection and a contact shadow in the first place is a separate decision — we have covered which one a piece of jewellery actually needs.
Where these prompts stop working
Everything above assumes a piece the model can read: a clear shot, a recognisable form, stones large enough to resolve. On a simple band or a plain chain, a good prompt genuinely saves time.
Jewellery is also the category where AI runs out of road fastest, and it is worth being specific about where:
Anything below a few pixels. Fine chains, milgrain edges, engraving, small pavé. Below a certain size a model is not reproducing detail, it is inventing something that looks like detail.
Stone identity. Facet patterns, inclusions, the specific character of a cut. These are the fingerprints of the actual stone your customer receives, and generated versions replace them with a generic ideal.
Metal that has to be accurate. Rose gold against copper, white gold against silver, platinum against steel. A hue shift of a few degrees changes what the piece is.
Anything with text. Hallmarks, brand names, watch dials, engraved messages. Models produce something text-shaped, reliably, and it is reliably not yours.
Used honestly that is not an argument against prompting — it is the case for knowing what to prompt. Run the straightforward pieces through a model, get better at describing edits while you do it, and send the pieces that carry the price to someone who will open the file. Our jewellery retouching service exists for exactly that second group, and if you sell through a shopfront as well as online, the retail jewellery work is the same team.
Frequently asked questions
Are the jewellery images in this article AI generated?
No. Every before and after here is real client work retouched by hand at Pixel Retouching. We used our own portfolio so you can see the standard these prompts aim at, rather than AI attempts presented as finished results.
Will an AI prompt give me the same result as these images?
On a plain band or a simple pendant, a good prompt gets close. On stones, chains, engraving and anything with a hallmark it does not, and the note under each prompt says where the gap opens. Treat the sliders as the target rather than the guaranteed output.
Can I use AI-edited jewellery photos on my listings?
Marketplaces judge the image, not how it was made. If you sell on Etsy, the slot-by-slot plan for an Etsy jewellery listing covers what each photograph has to do. The risk with jewellery is factual rather than aesthetic: a changed stone count, a shifted metal colour or a redrawn hallmark is a misdescription, and that is a dispute rather than a design opinion.
Why do the diamonds look wrong in my AI results?
Because facets are small, regular and highly reflective — the exact combination models handle worst. They approximate a brilliant cut instead of reproducing yours. Always compare the table and crown against your original at 100%.
Which AI tool is best for jewellery photos?
Any tool that edits your uploaded photograph rather than generating from text. Dedicated product-photo tools tend to handle the background and the cut-out better; general models tend to handle overall colour better. Neither reliably handles stones.
Do I still need a retoucher for jewellery?
For plain pieces and clean shots, often not. For stones, fine chains, two-tone metal, hallmarks and anything shot for a campaign, yes. The practical approach is to prompt the easy pieces and route the rest to a person.
See it on your own pieces
If you would rather judge this on your own photographs than on ours, send three images through the free trial. A retoucher edits them by hand and sends them back within 24 hours. No card, and you keep the files either way — including any you have already run through a prompt, which is the fastest way to see the difference side by side.